Chatham IT Helpdesk
With the vast amount of technology we use day to day there is a growing need for a platform to get support. This page serves a function as a guide for our employees to learn how to take advantage of many of the new technological advancements we have at Chatham Emergency Services. If further assistance or troubleshooting is needed please reach out to your direct supervisor or follow the procedures on how to submit an IT Support Ticket on ePro.
Guides and Frequently Asked Questions
How to Submit a Support Ticket
For the fastest service, Chatham employees should log all IT issues through ePro whenever possible. To log a ticket:
1. Log into ePro.
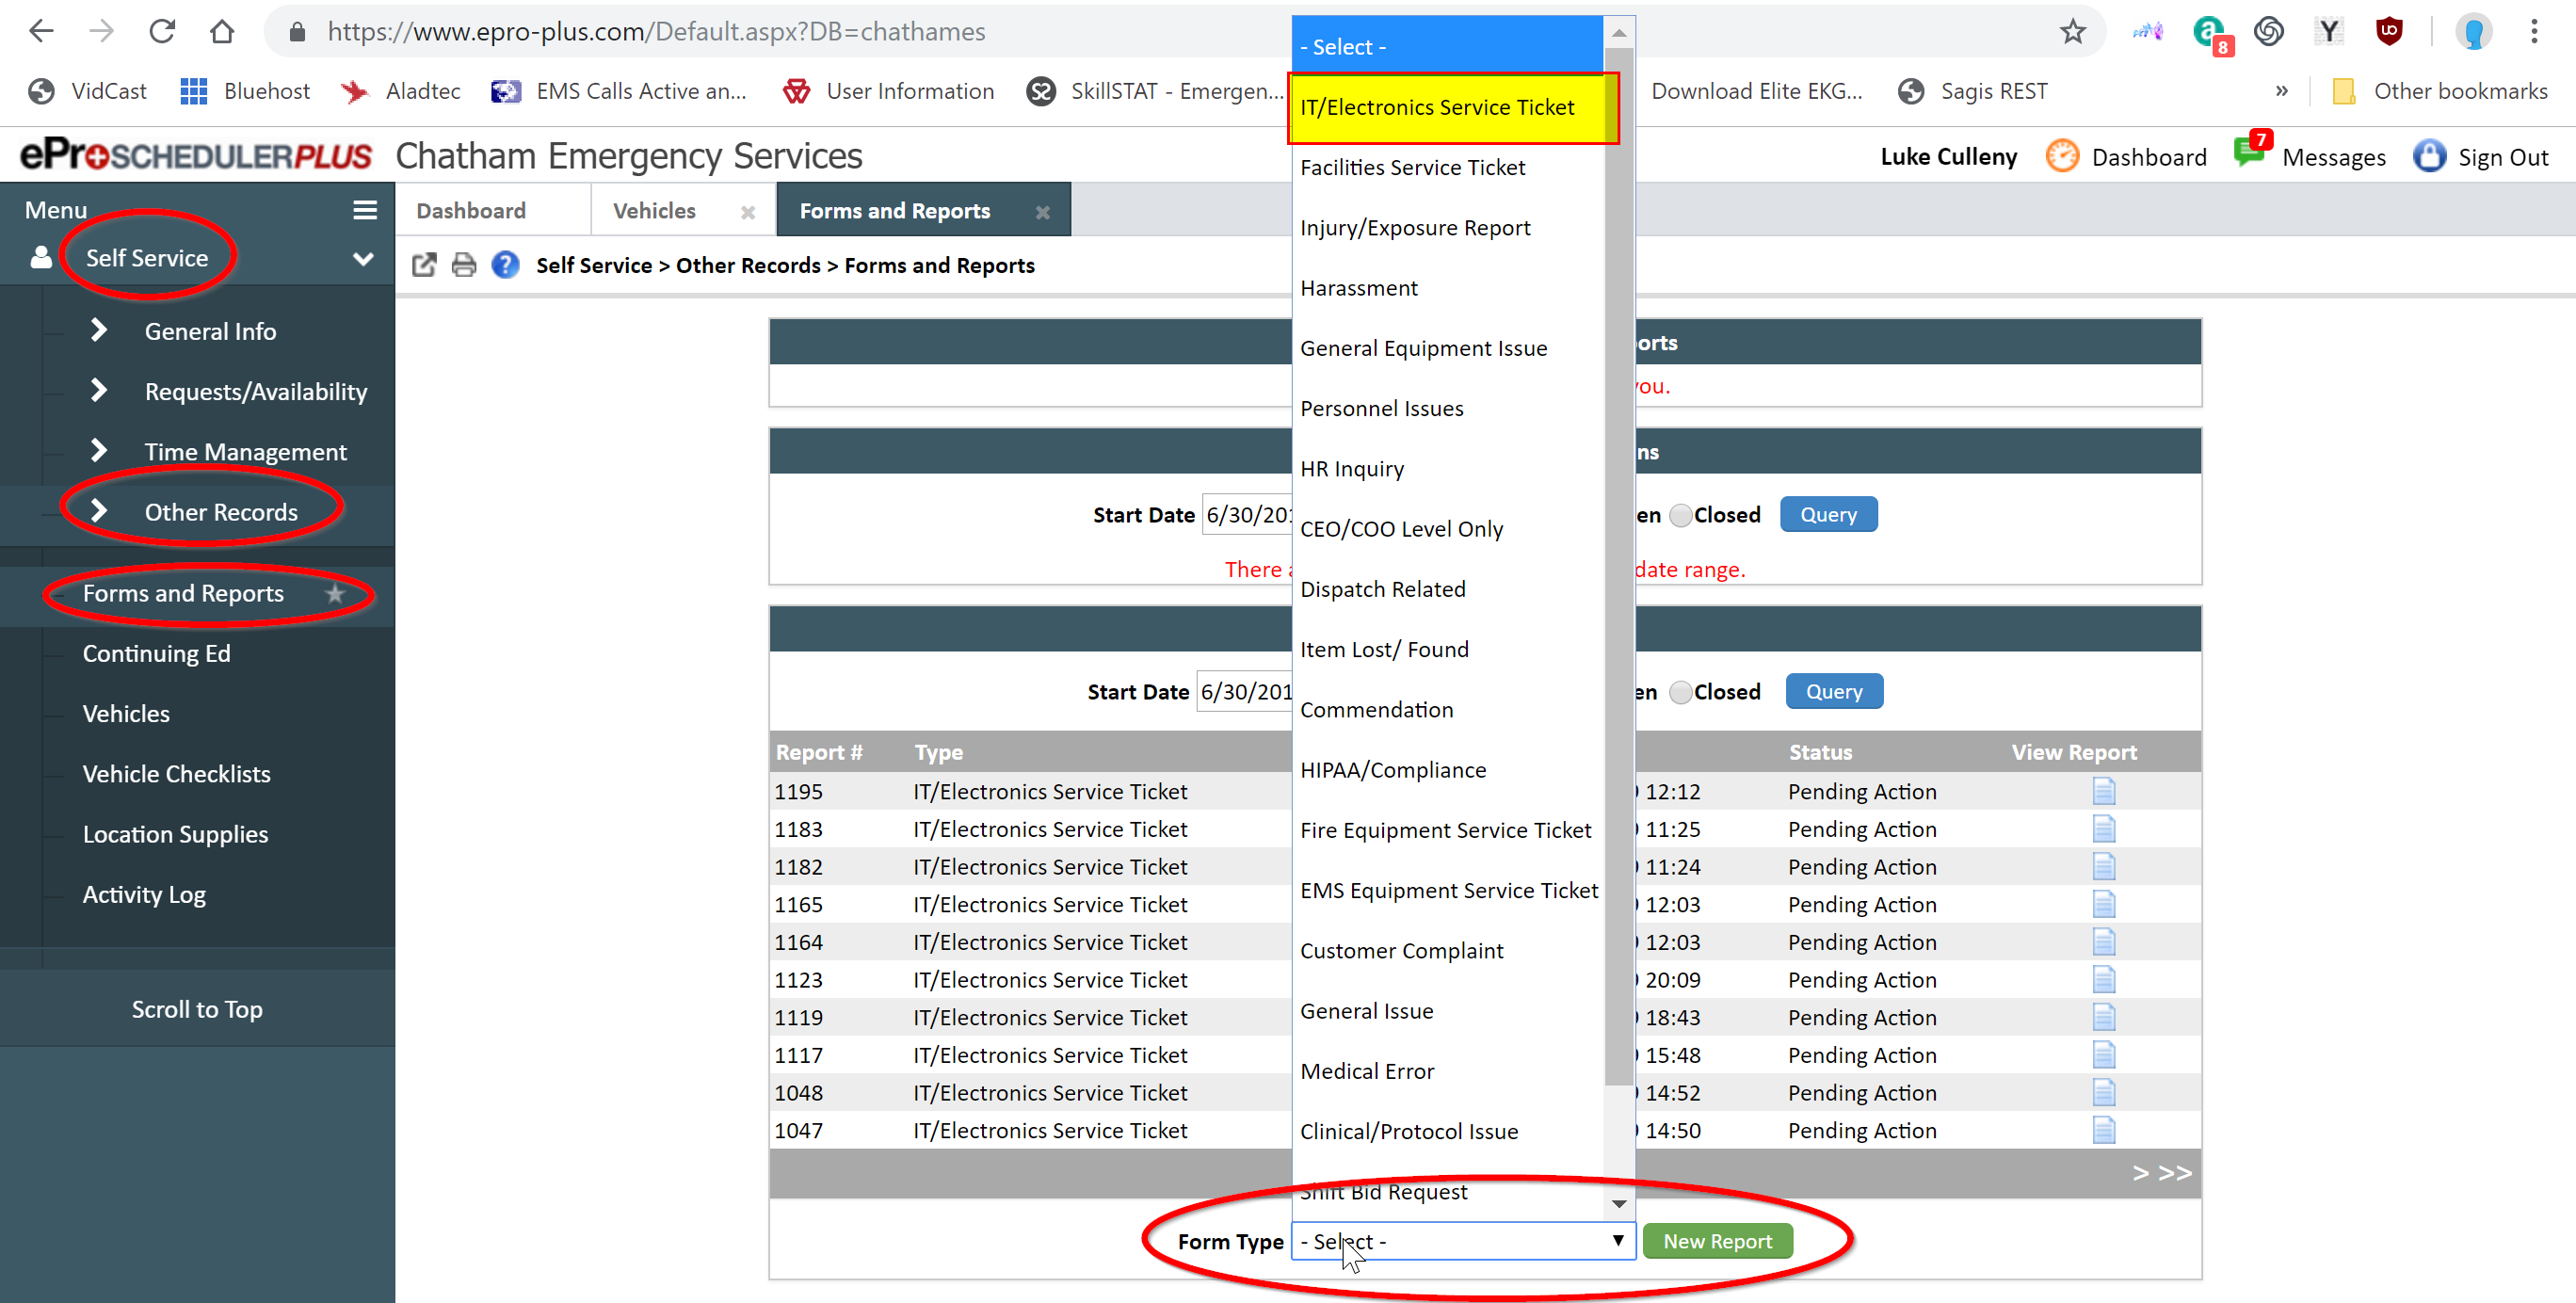
2. On the left hand side select Self-Service, then Other Records, then Forms and Reports. (If you are on a mobile device this may be called Incident Reports.)
3. Once inside the Forms and Reports window you will select IT/Electronics Service Ticket from the drop down at the bottom of the screen next to “Form Type”. Click New Report.
4. A window will open where you must input your name and the type of issue, be sure to press “the green Add Button. Answer the remaining questions and input a brief description of the problem.

5. When you are finished, click submit and your ticket will be fielded by our Team as soon as possible. You will receive a notification in ePro when your ticket has been closed.
Perform a CAD Download (EMS)
CAD Data can be downloaded at any point during or after a call. These downloads automatically input the Call Nature, Unit Info, Crew Members, Address, Times, and Mileages into your report and drastically decrease the amount of time needed to complete a report. Internet is required in order to perform a CAD Download. If internet issues are occurring please submit an IT ticket within ePro. Reports should always be started from a CAD Download wherever possible and the traditional manual entry report should only be done in instances of internet issues or when the CAD is undergoing maintenance.
1. While logged into Field Elite start a new report by clicking “New Incident” or selecting the appropirate Template. Confirm your crew information and click “Yes.”
2. Once inside the report at the top you will see a button that says “CAD”, click it.
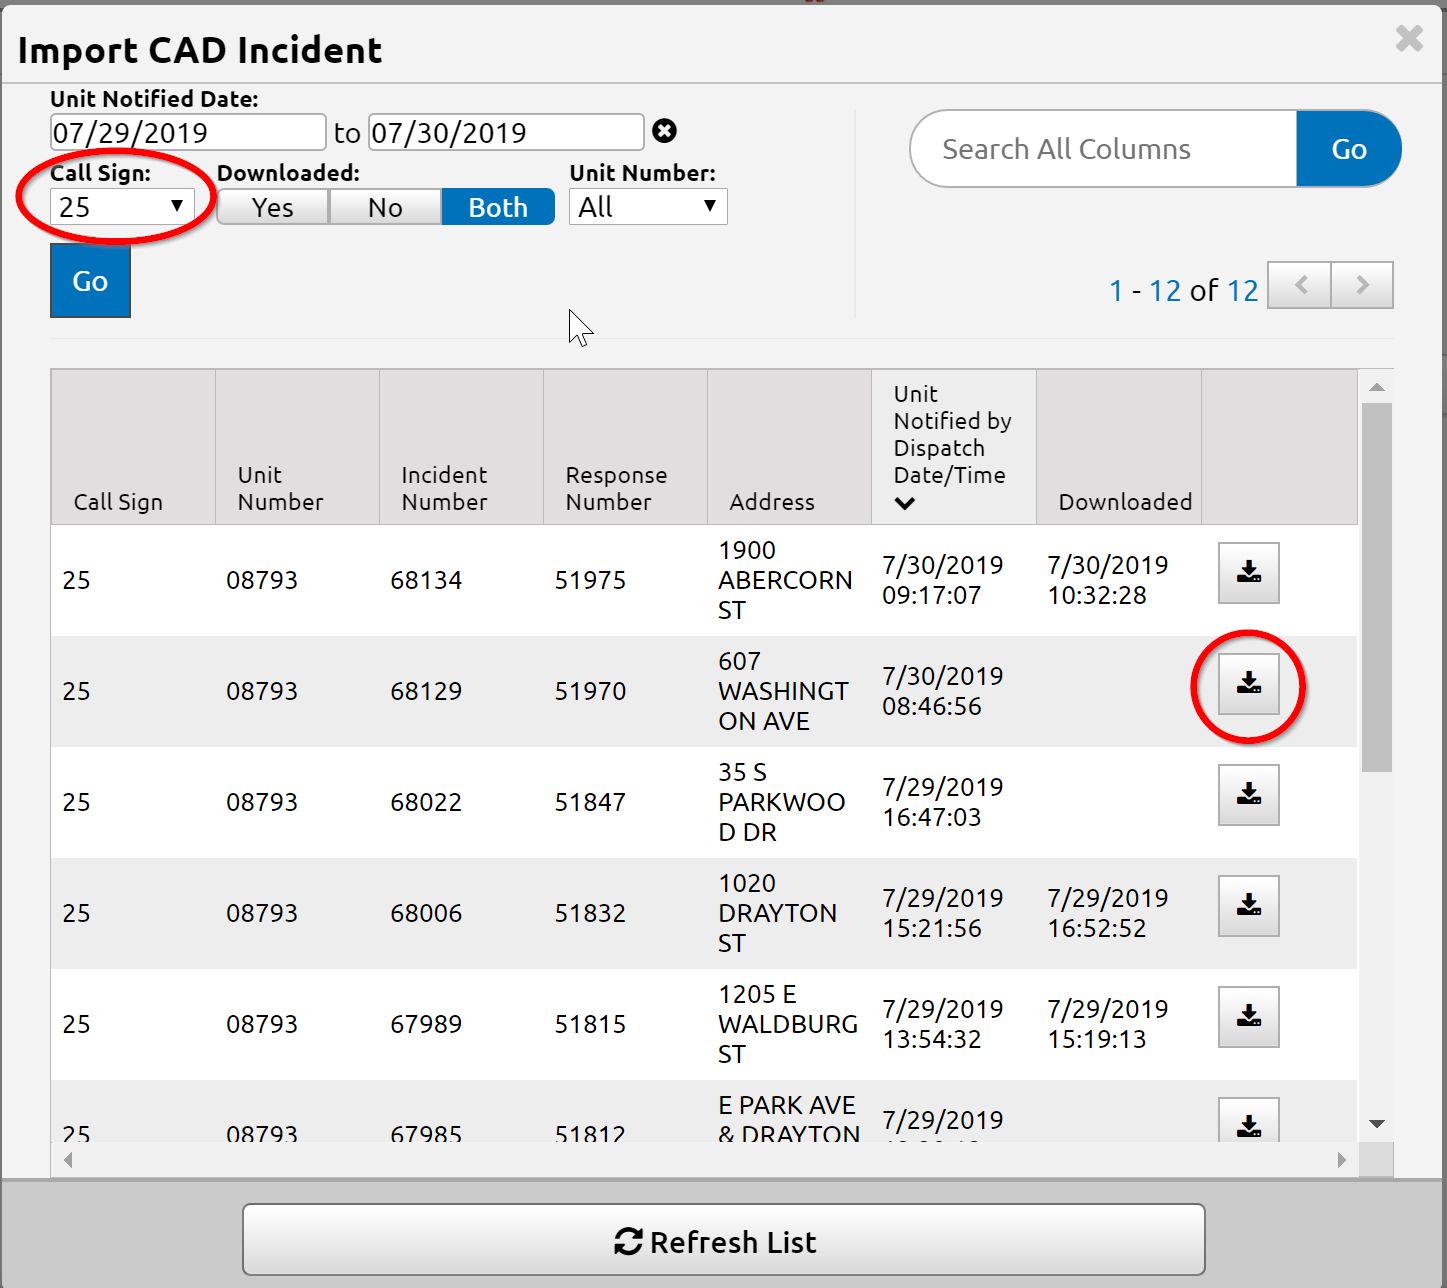
3. The window will open with all available CAD Data. Select your unit’s Call Sign in the upper left and a list of calls will be displayed. Find the correct call in the list and select the button on the far right. NOTE: It can take up to 3 minutes for a call to be available to download, click Refresh List.
4. All available data will be inputted into the report. You do not need to change incident numbers. Continue your report as required by validation and proper patient documentation.
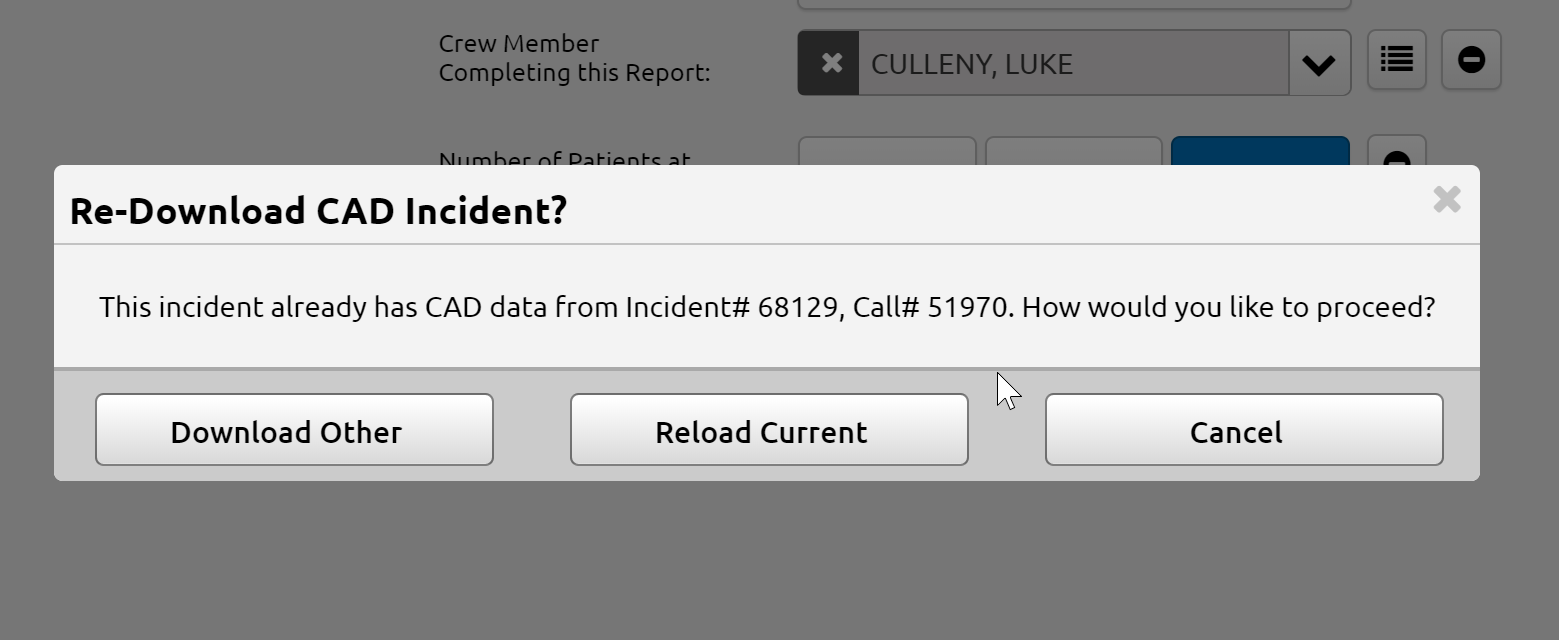
5. At the end of the call you can re-download the CAD Data to recieve finalized times and mileage. To do this, simply re-click the “CAD” button at the top of the screen and select “Reload Current.”
In the event any of the above steps fail, you can always do the report manually using the information from Active911.
Perform a CAD Download (FIRE)
CAD Data can be downloaded at any point during or after a call. These downloads automatically input the Unit Info, Crew Members, Address and Unit Times into your report and drastically decrease the amount of time needed to complete a report. Reports should always be started from a CAD Download wherever possible and the traditional manual entry report should only be done in instances of internet issues or when the CAD is undergoing maintenance.
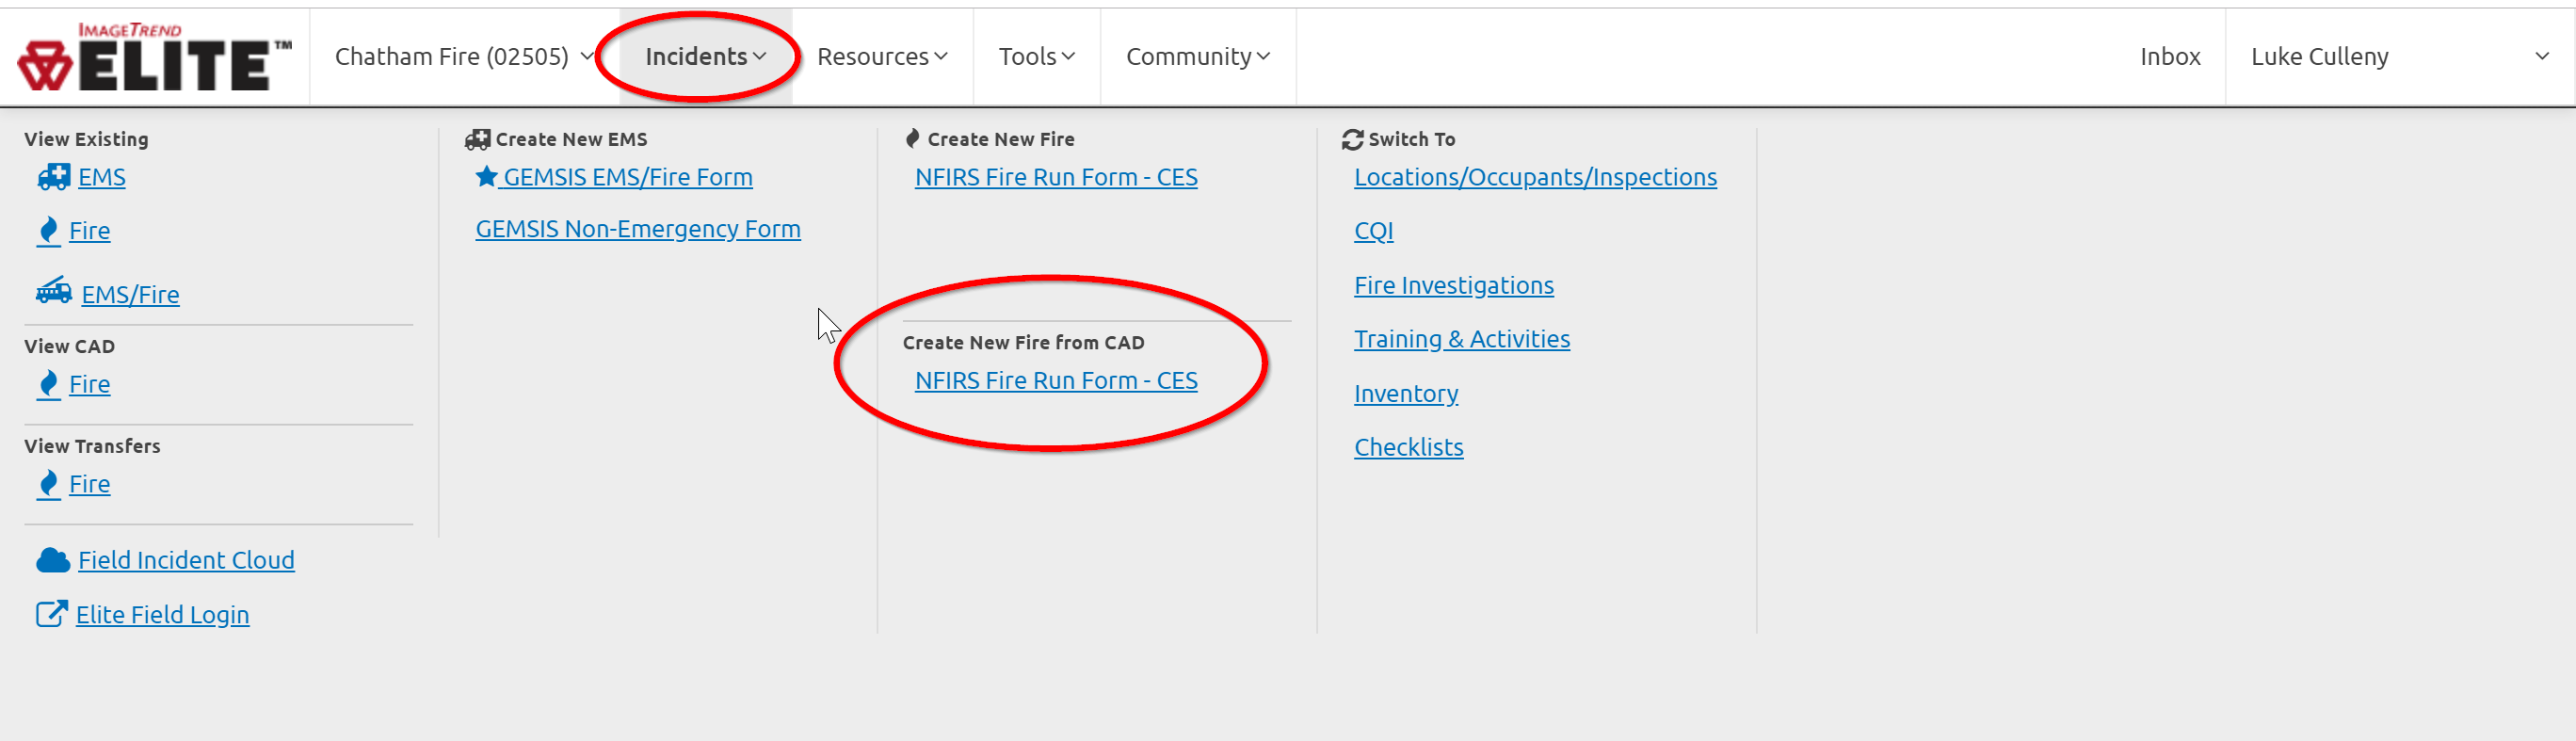
1. Login to ImageTrend Elite. At the top go to “Incidents” and then select the link below “Create New Fire from CAD”.
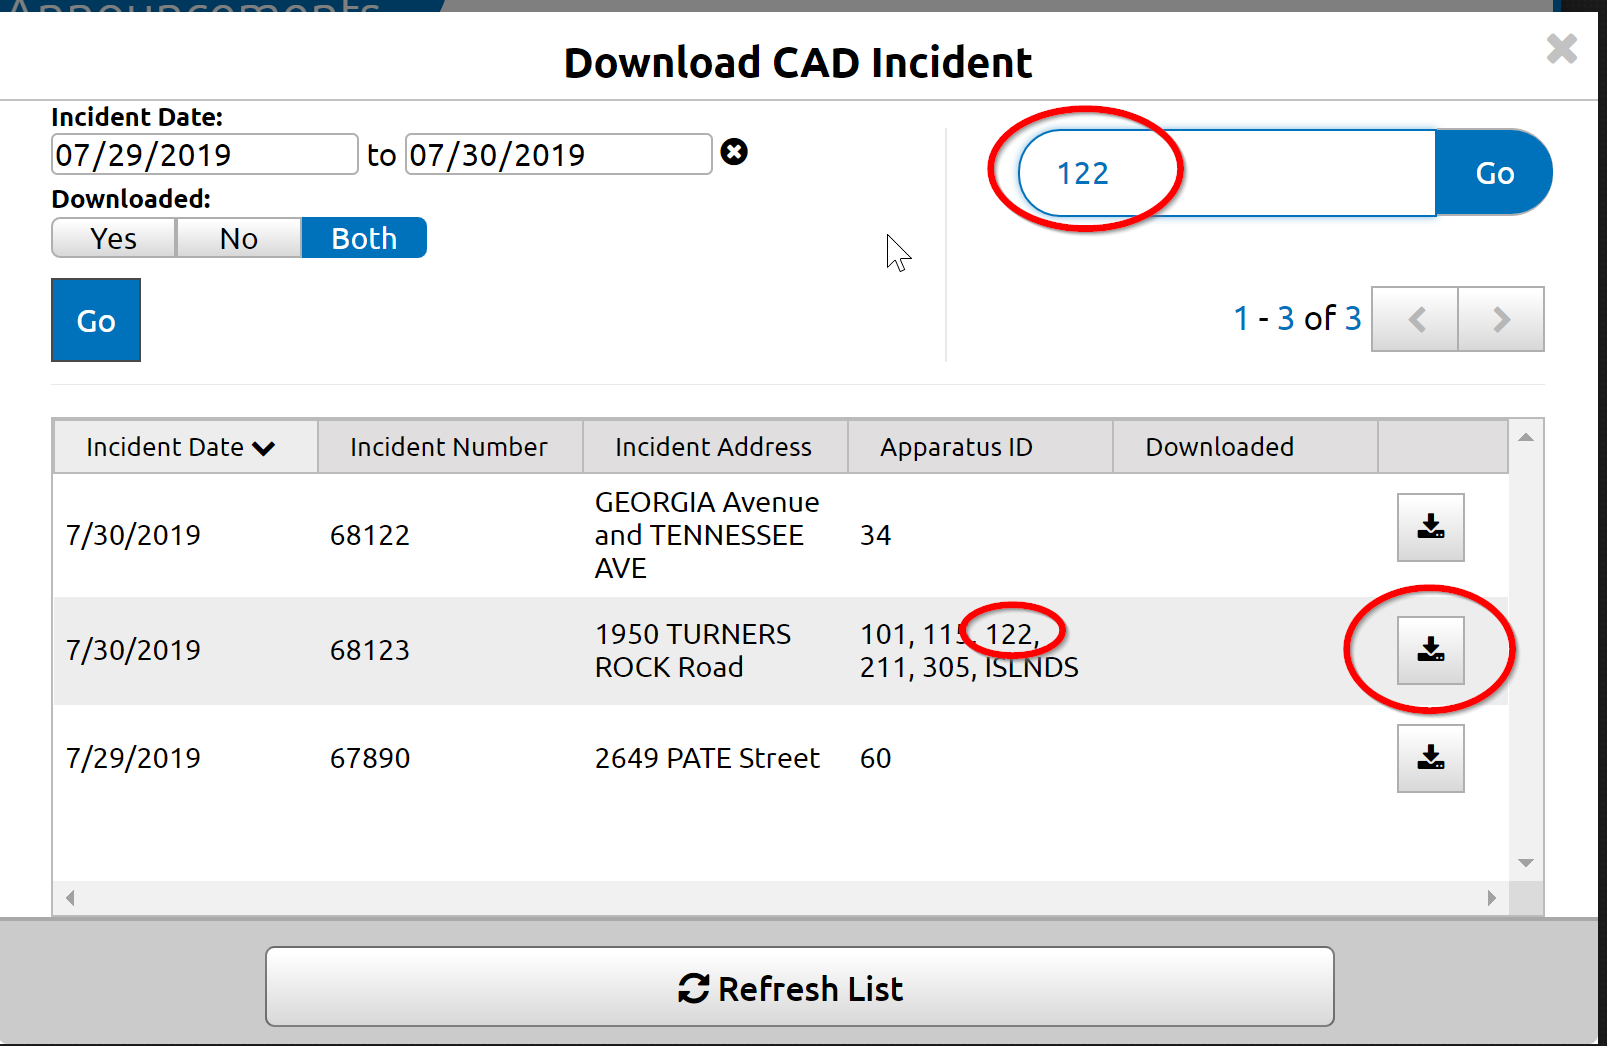
2. The CAD window will open showing all available reports for download. In the upper right, search for the run with your Unit Number or Incident Address. Verify the run you are selecting has all the responding fire units in it under Apparatus ID column. Click the download icon on the far right.
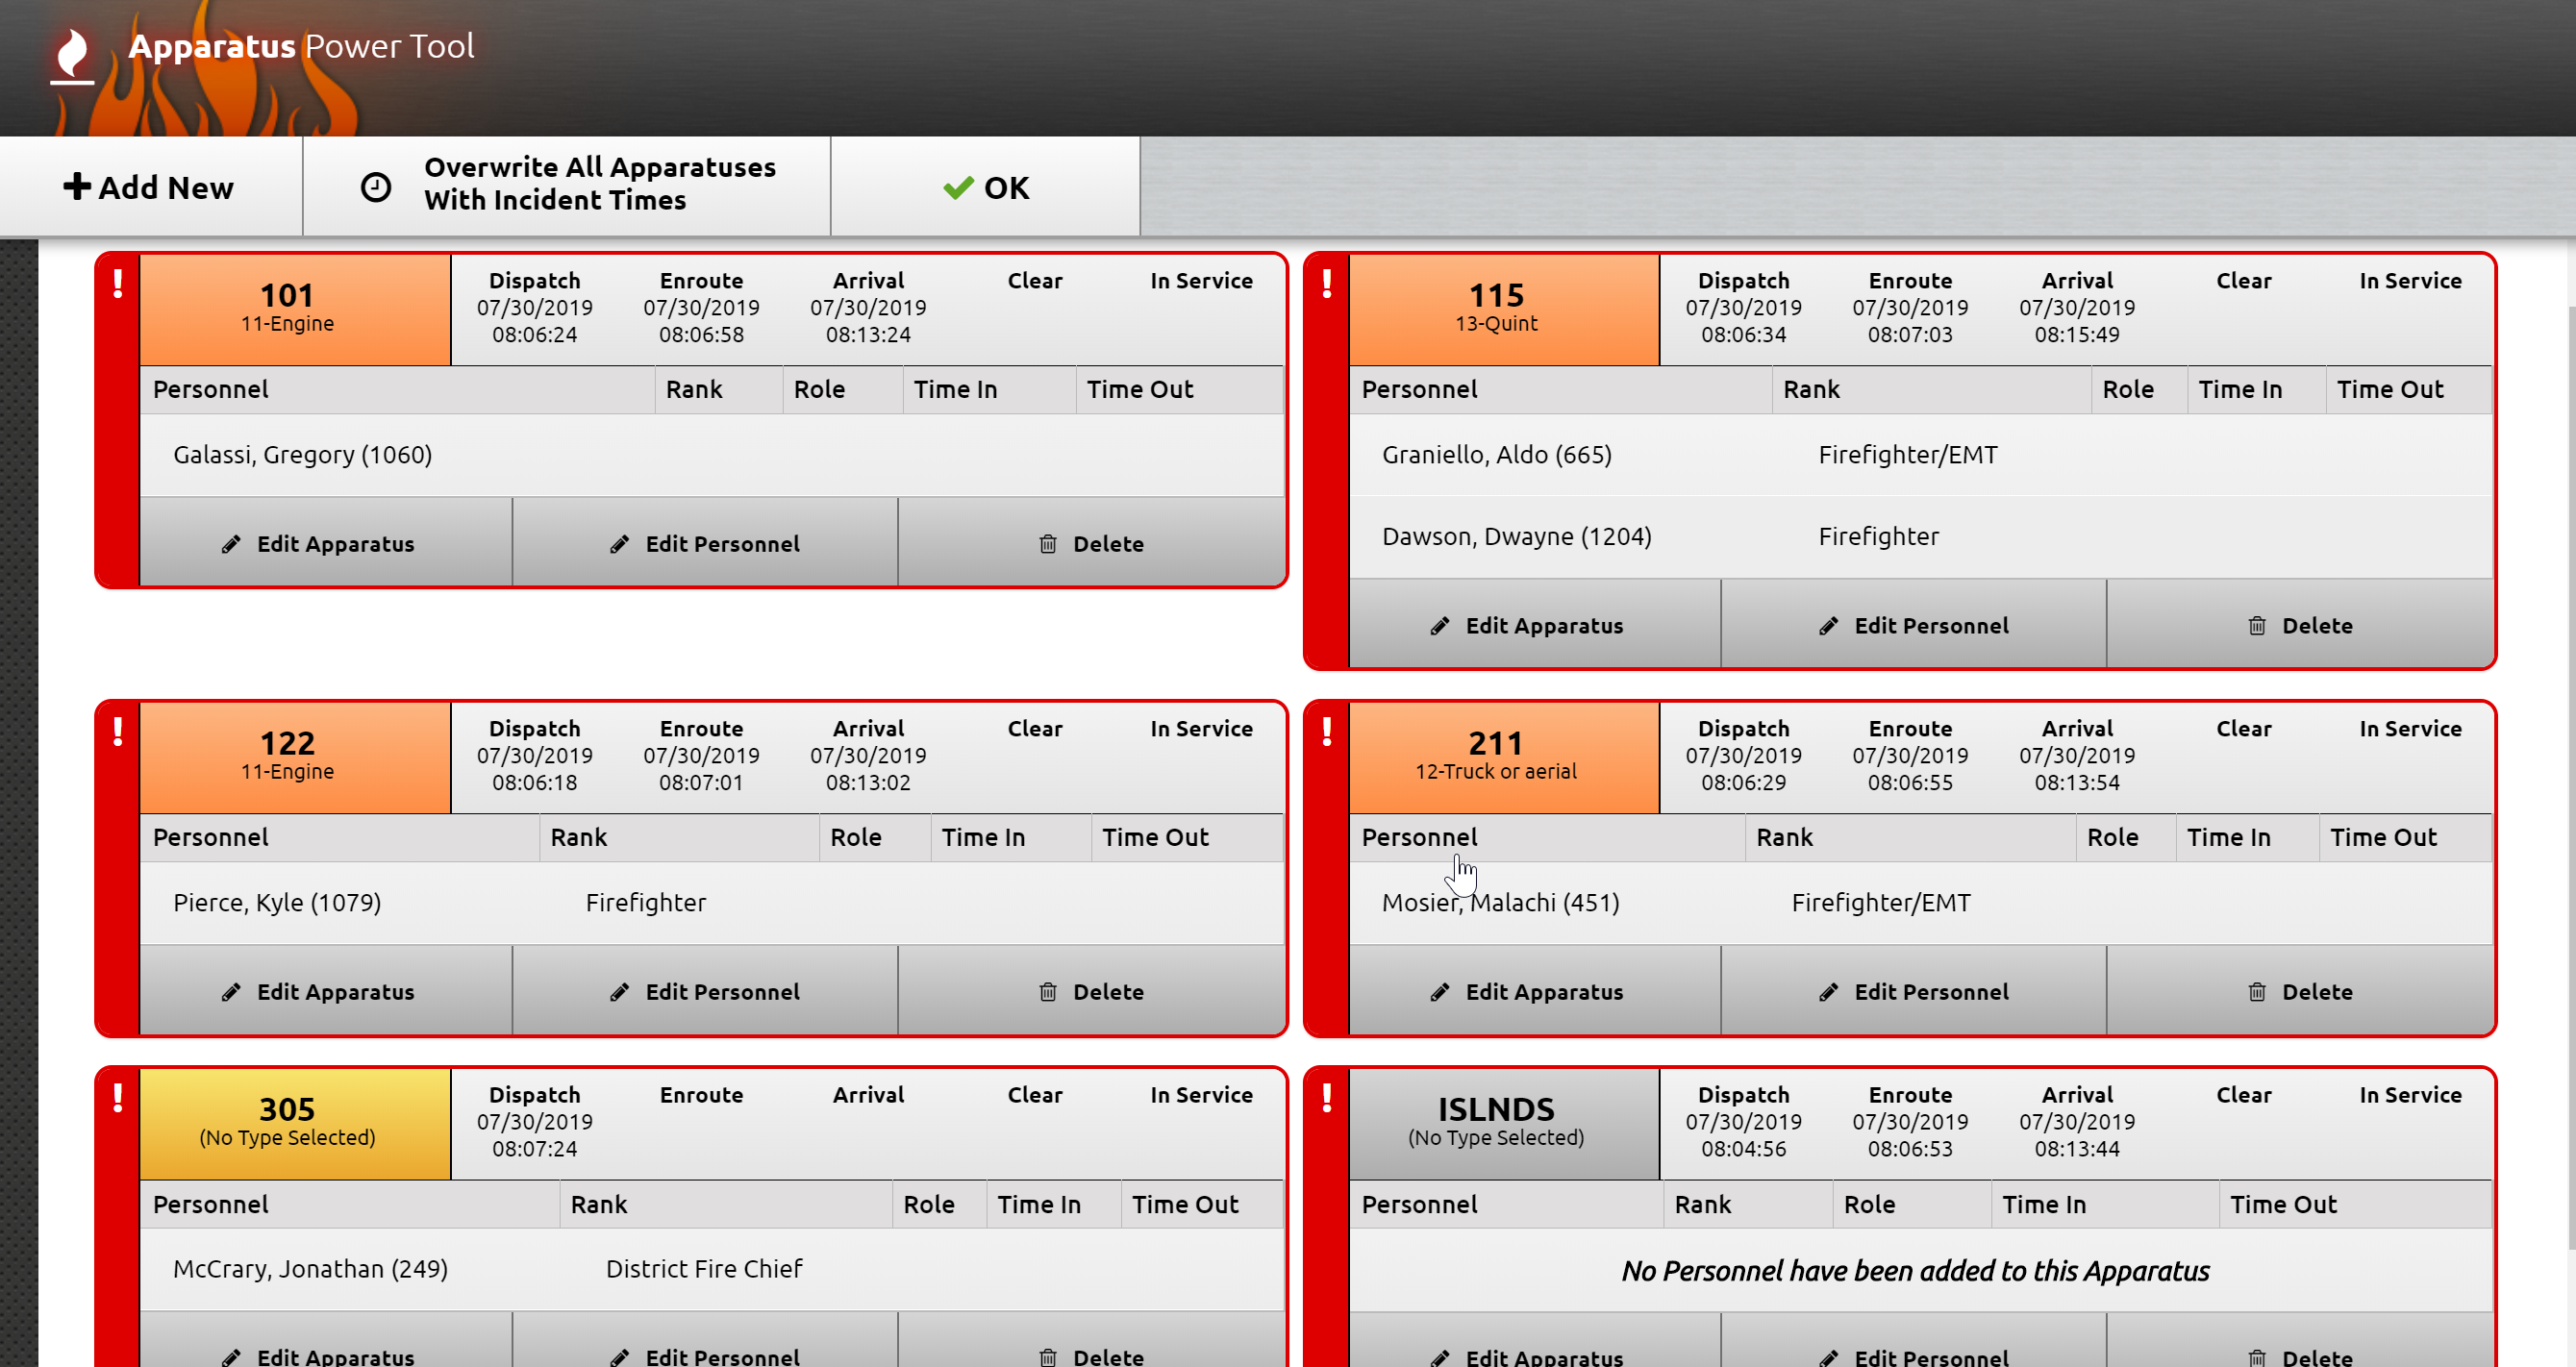
3. The report will be generated and will notify you of the number of personnel being updated. Click OK. All available fields will be populated into the report. You do not need to change the Incident Number. Verify that all auto-populated information is correct.
4. Under Apparatus, ensure all times are accurate for each unit and add the cleared time if needed. You will have to enter the Response Mode to scene as well as the Primary and any Seconday Actions Taken for each unit. Enter any volunteer responders under the volunteer unit.
Download LifePak 15 Data to Elite
Our LifePak 15’s have the ability to transmit all cardiac monitor data directly into your ImageTrend Reports, this includes Vitals, EKGs, Medications and advanced interventions like Pacing, Defibrillation, Cardioverting, etc. This functionality utilizes the internet within the truck to transmit wirelessly from the Lifepak 15 to ImageTrend, the monitor data is then downloaded within the ImageTrend report from the Physio Control Cloud. This process will automatically input Procedures, Vitals, Medications and Medical Devices into the report with minimal additional information needed from the crew members.
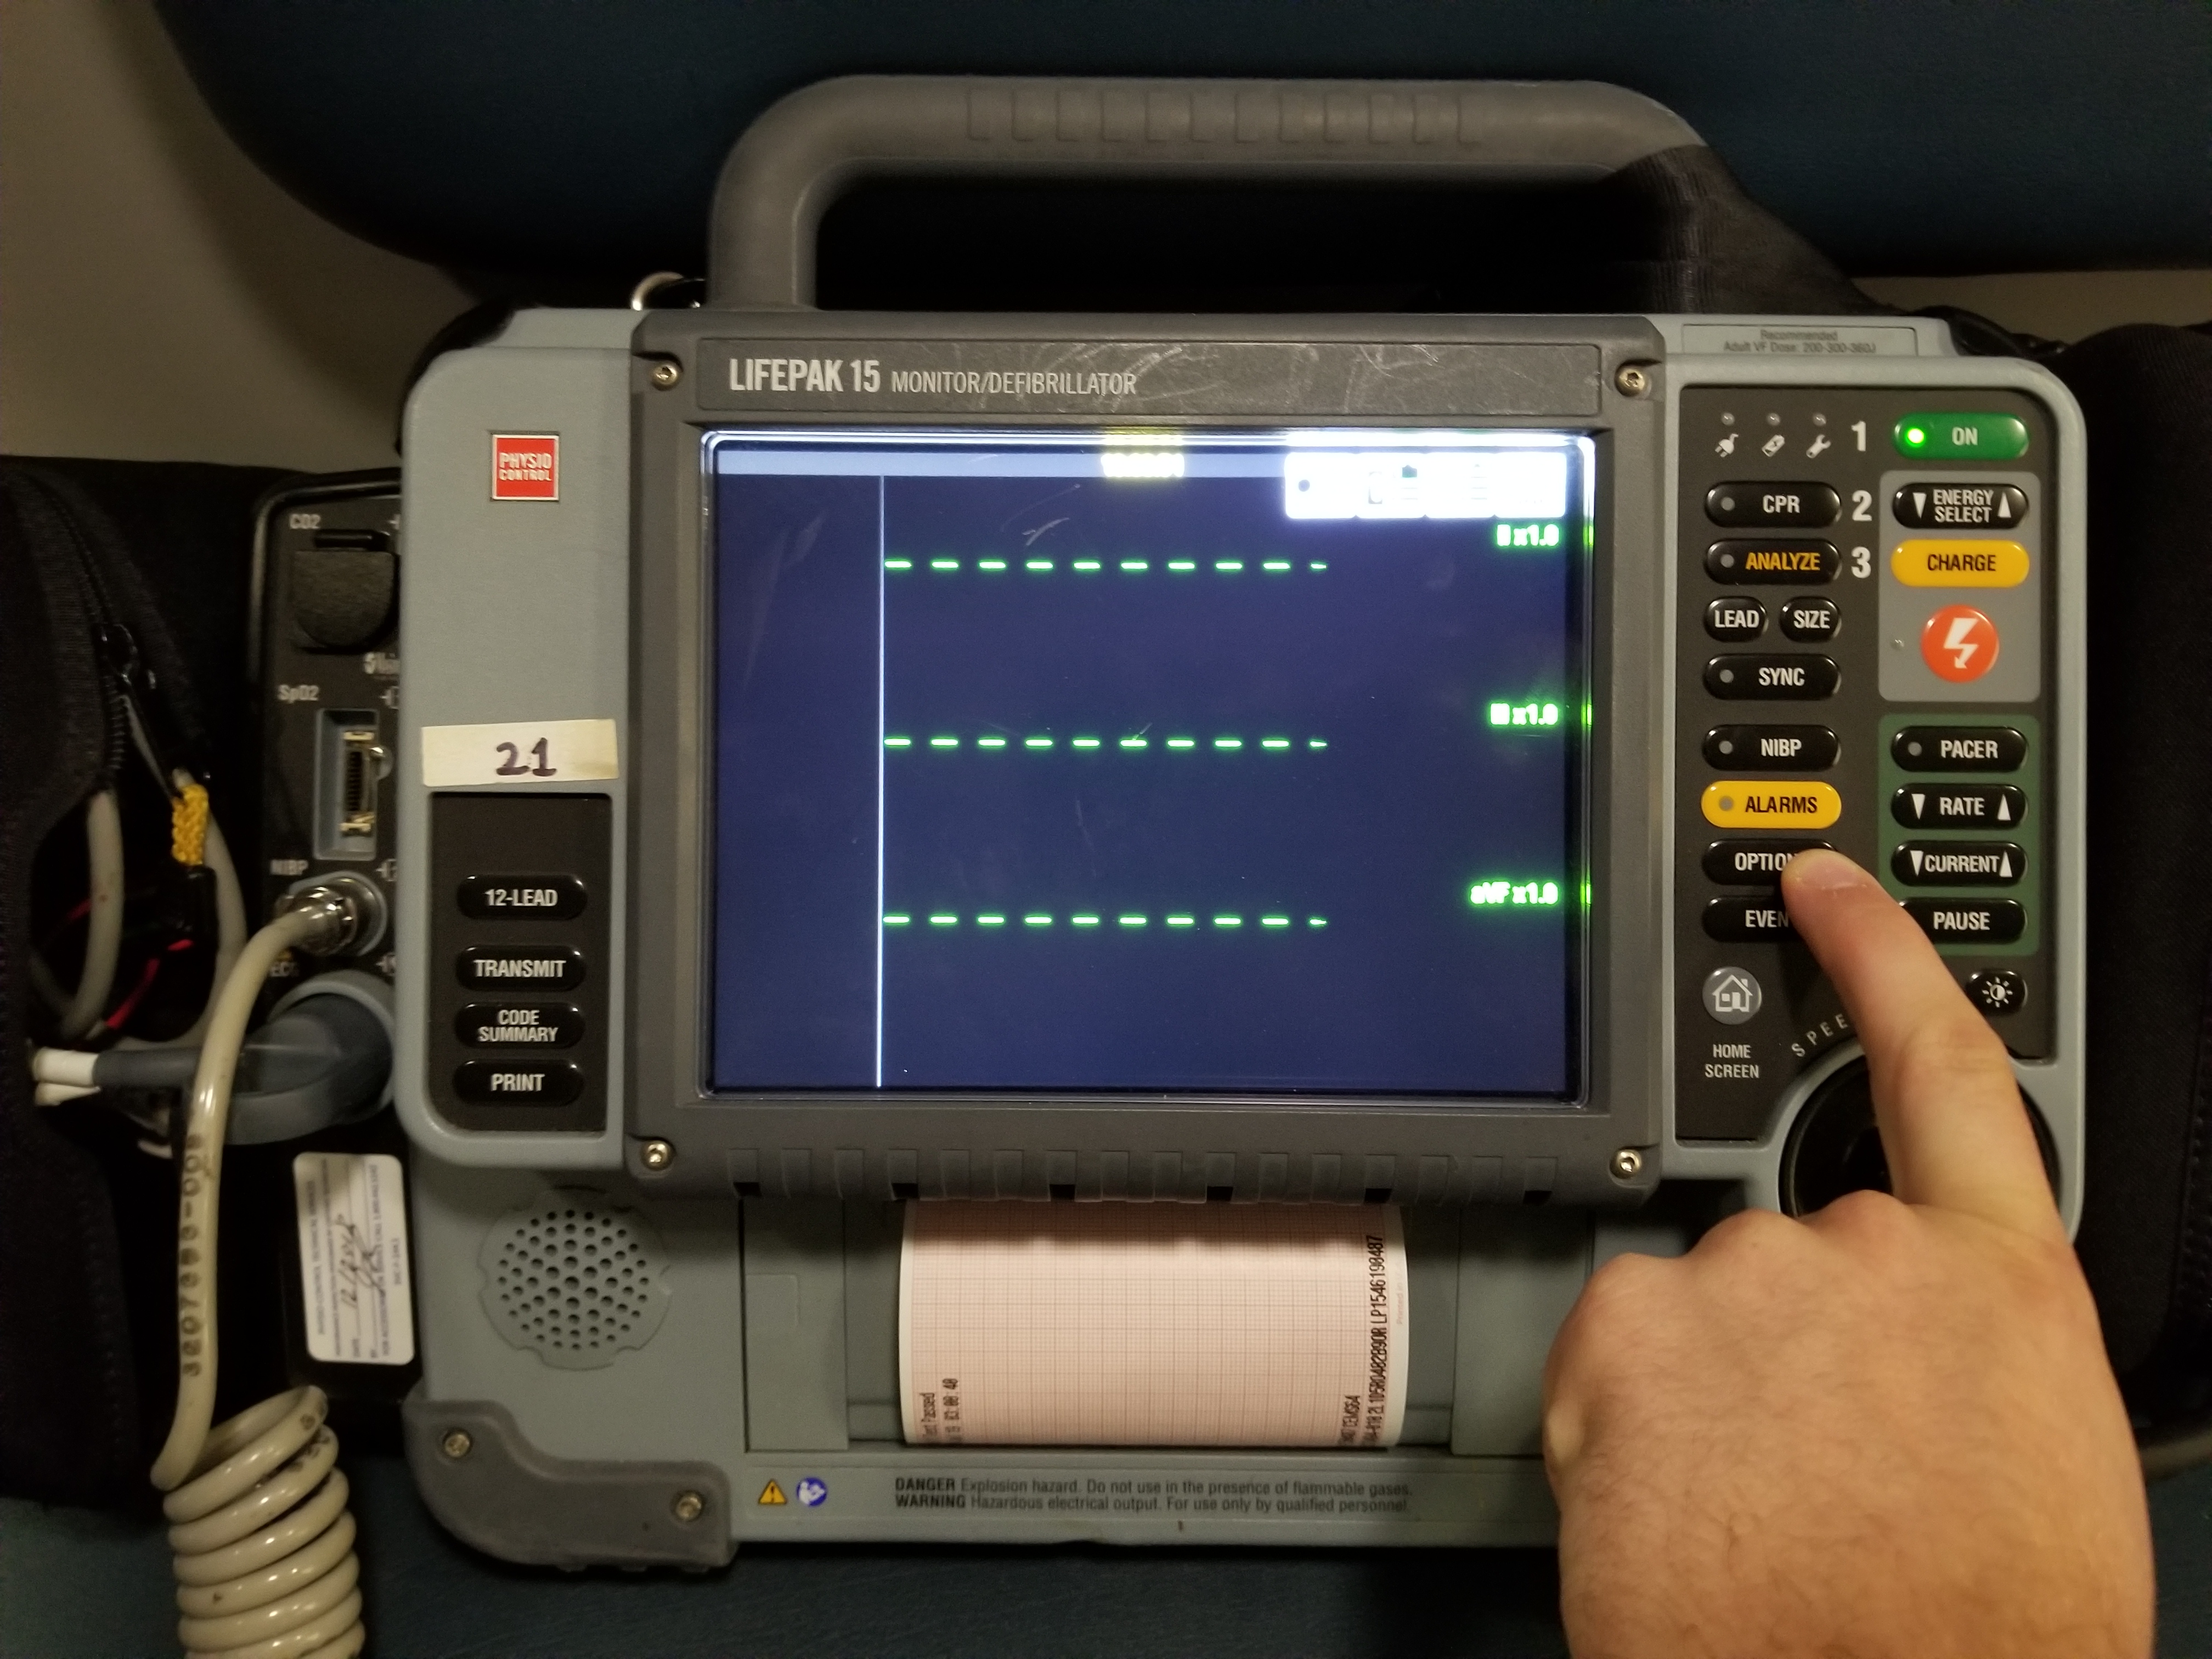
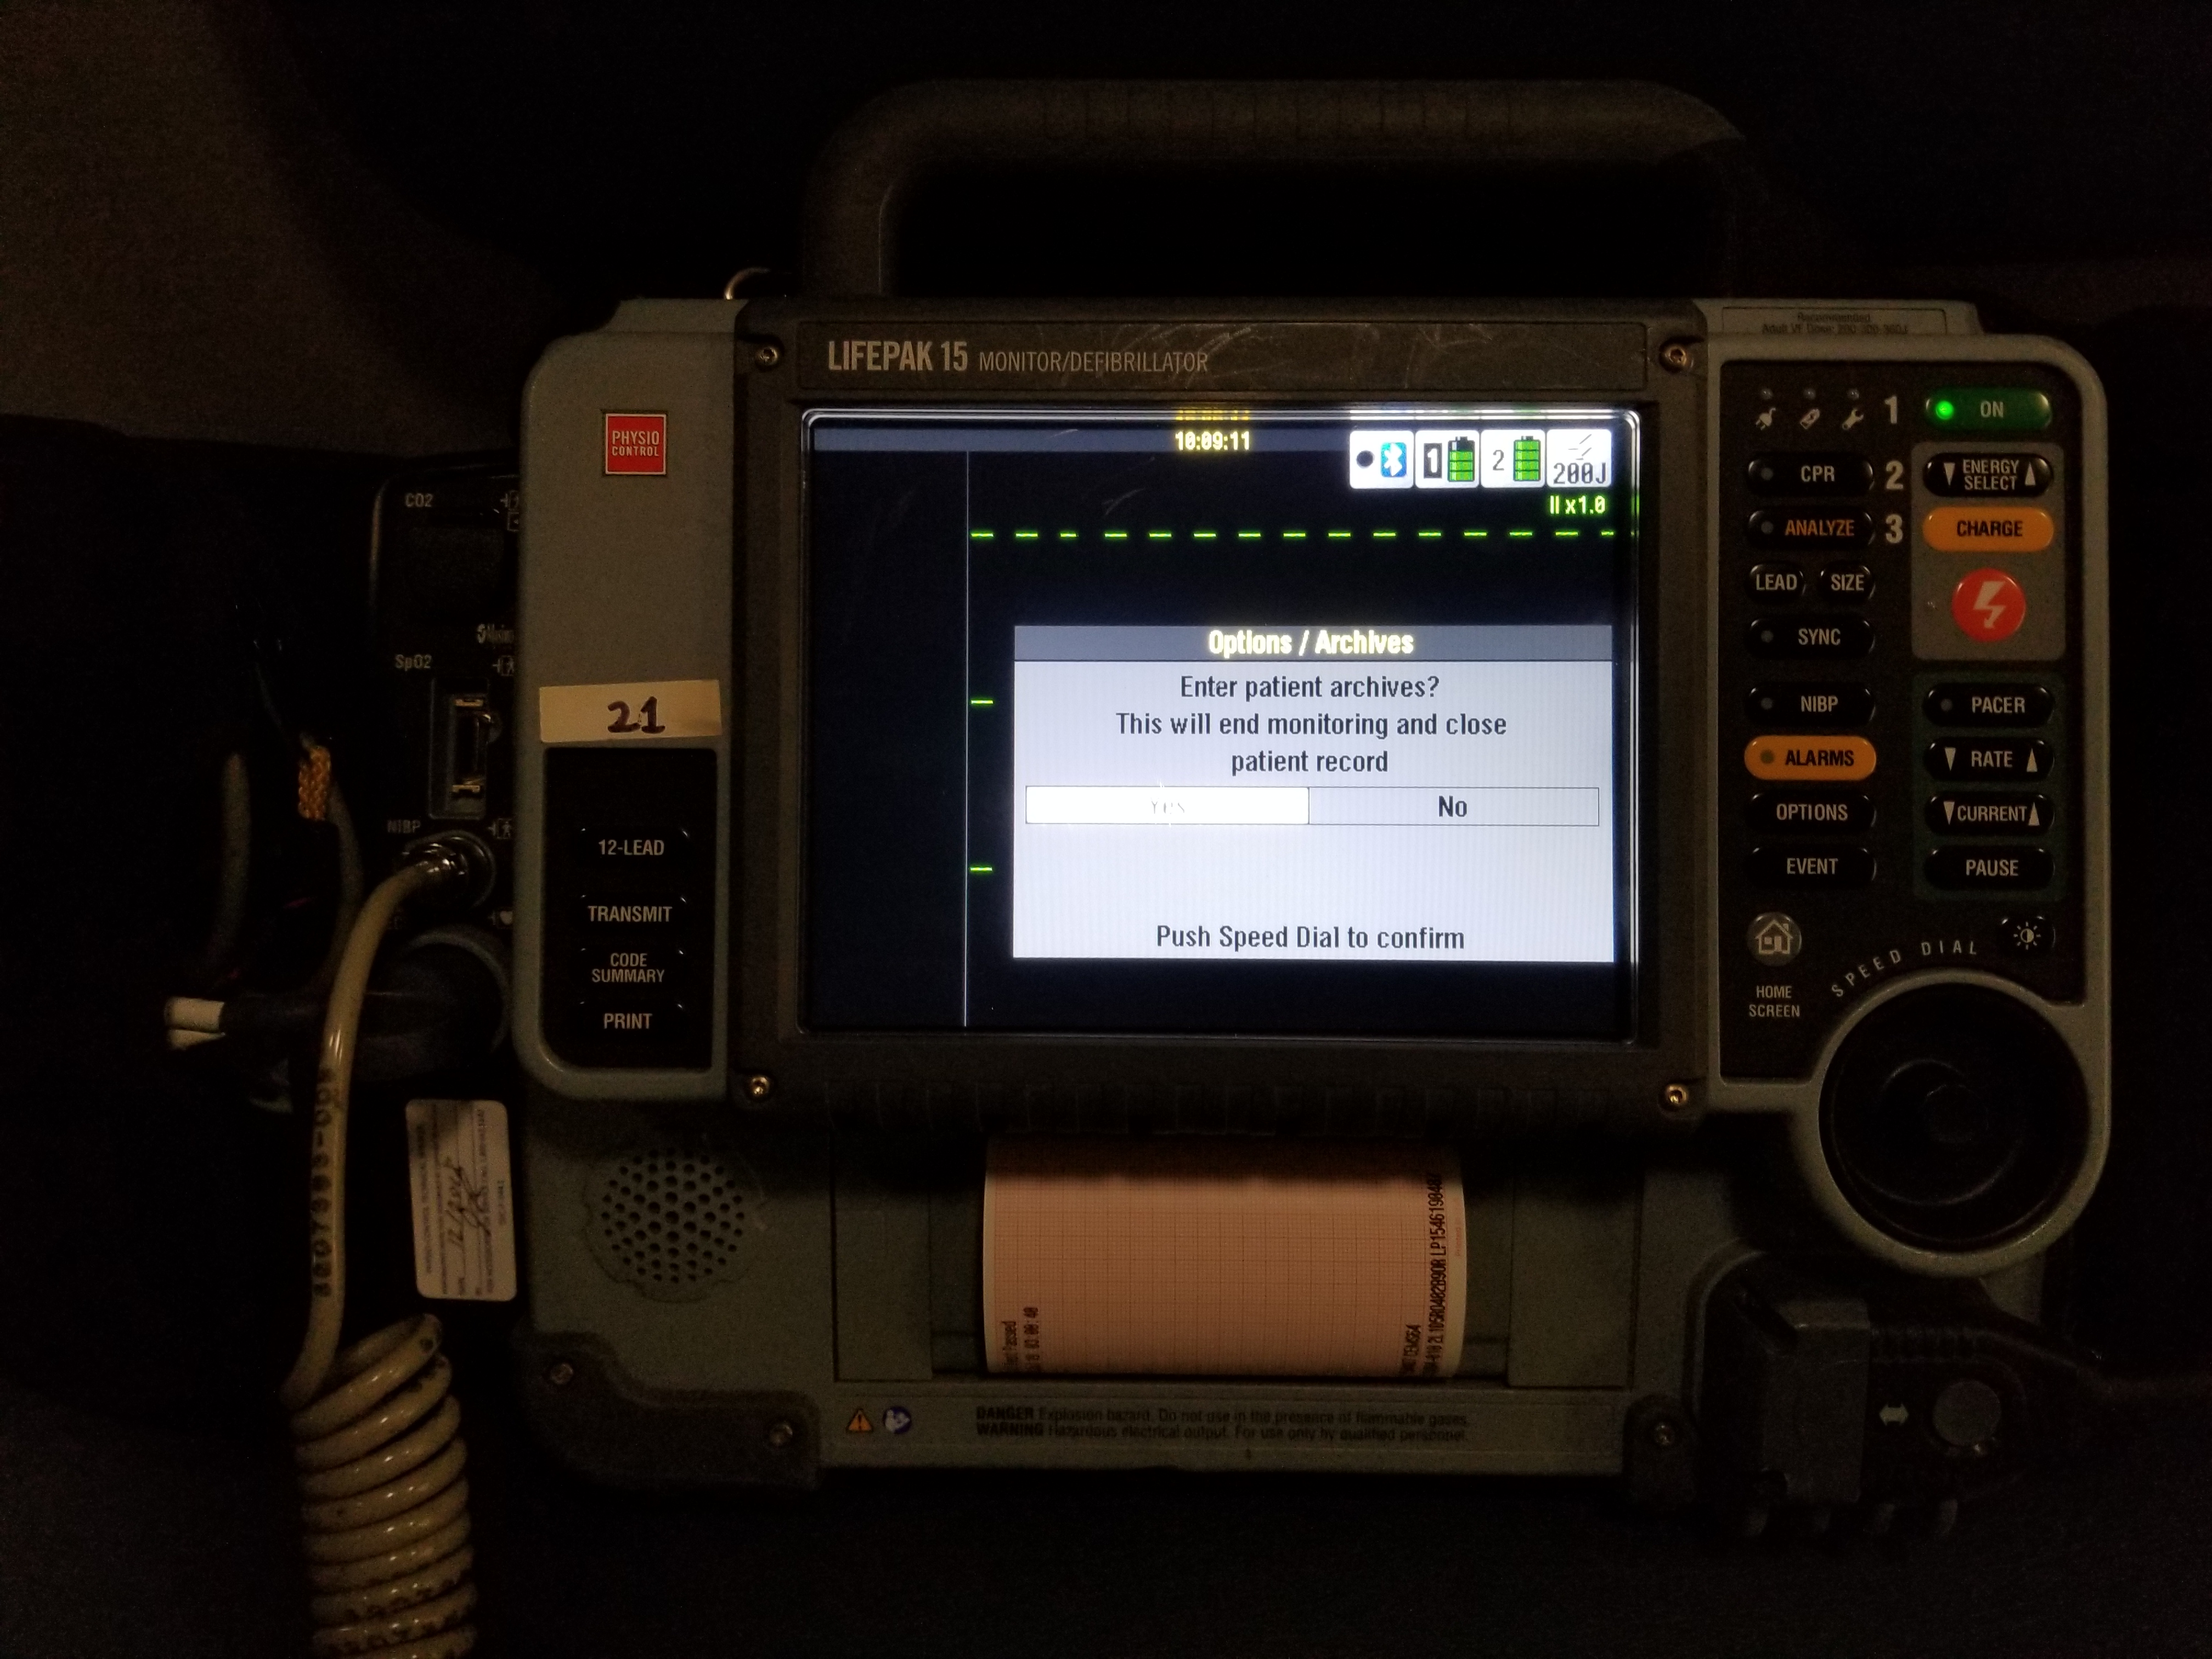
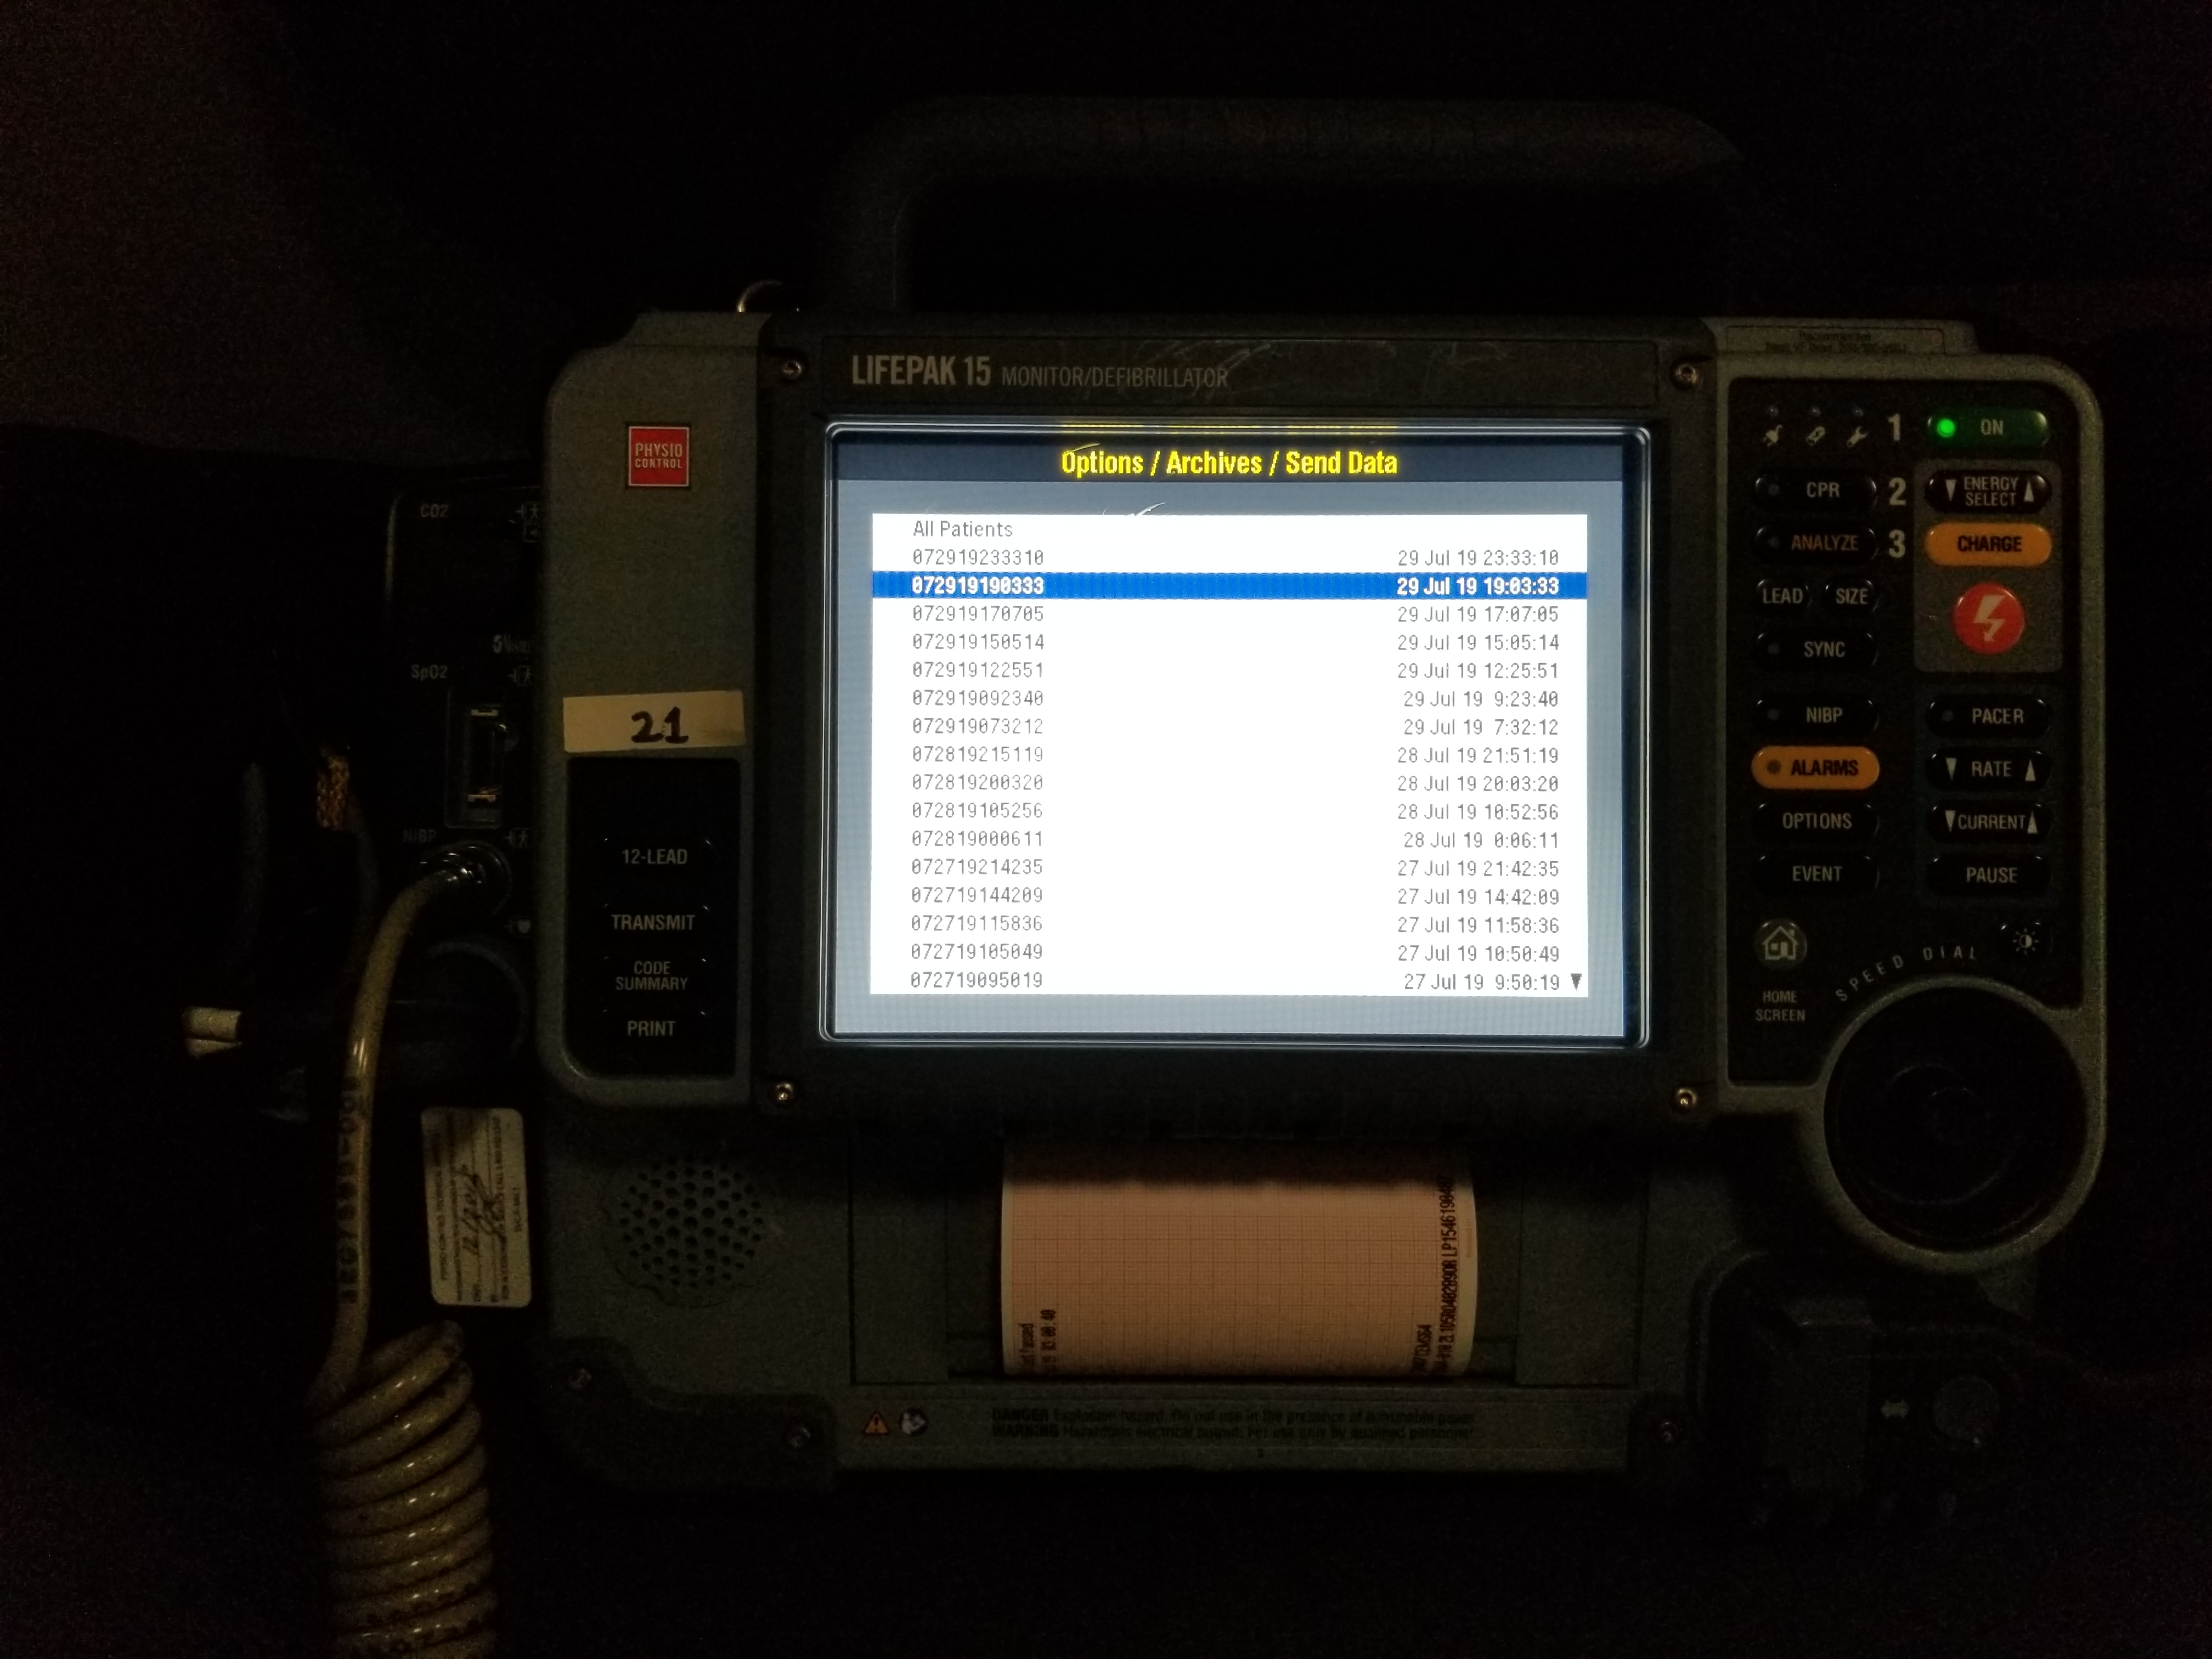
1. Wait until the end of the transport/call to download data. Once your call is over begin by pressing the Options button on the LifePak. Select Archives from the list and then click yes.
2. Once inside the archives, select the “Send Data” option, scroll down to patient and select your recent patient’s data from the list.
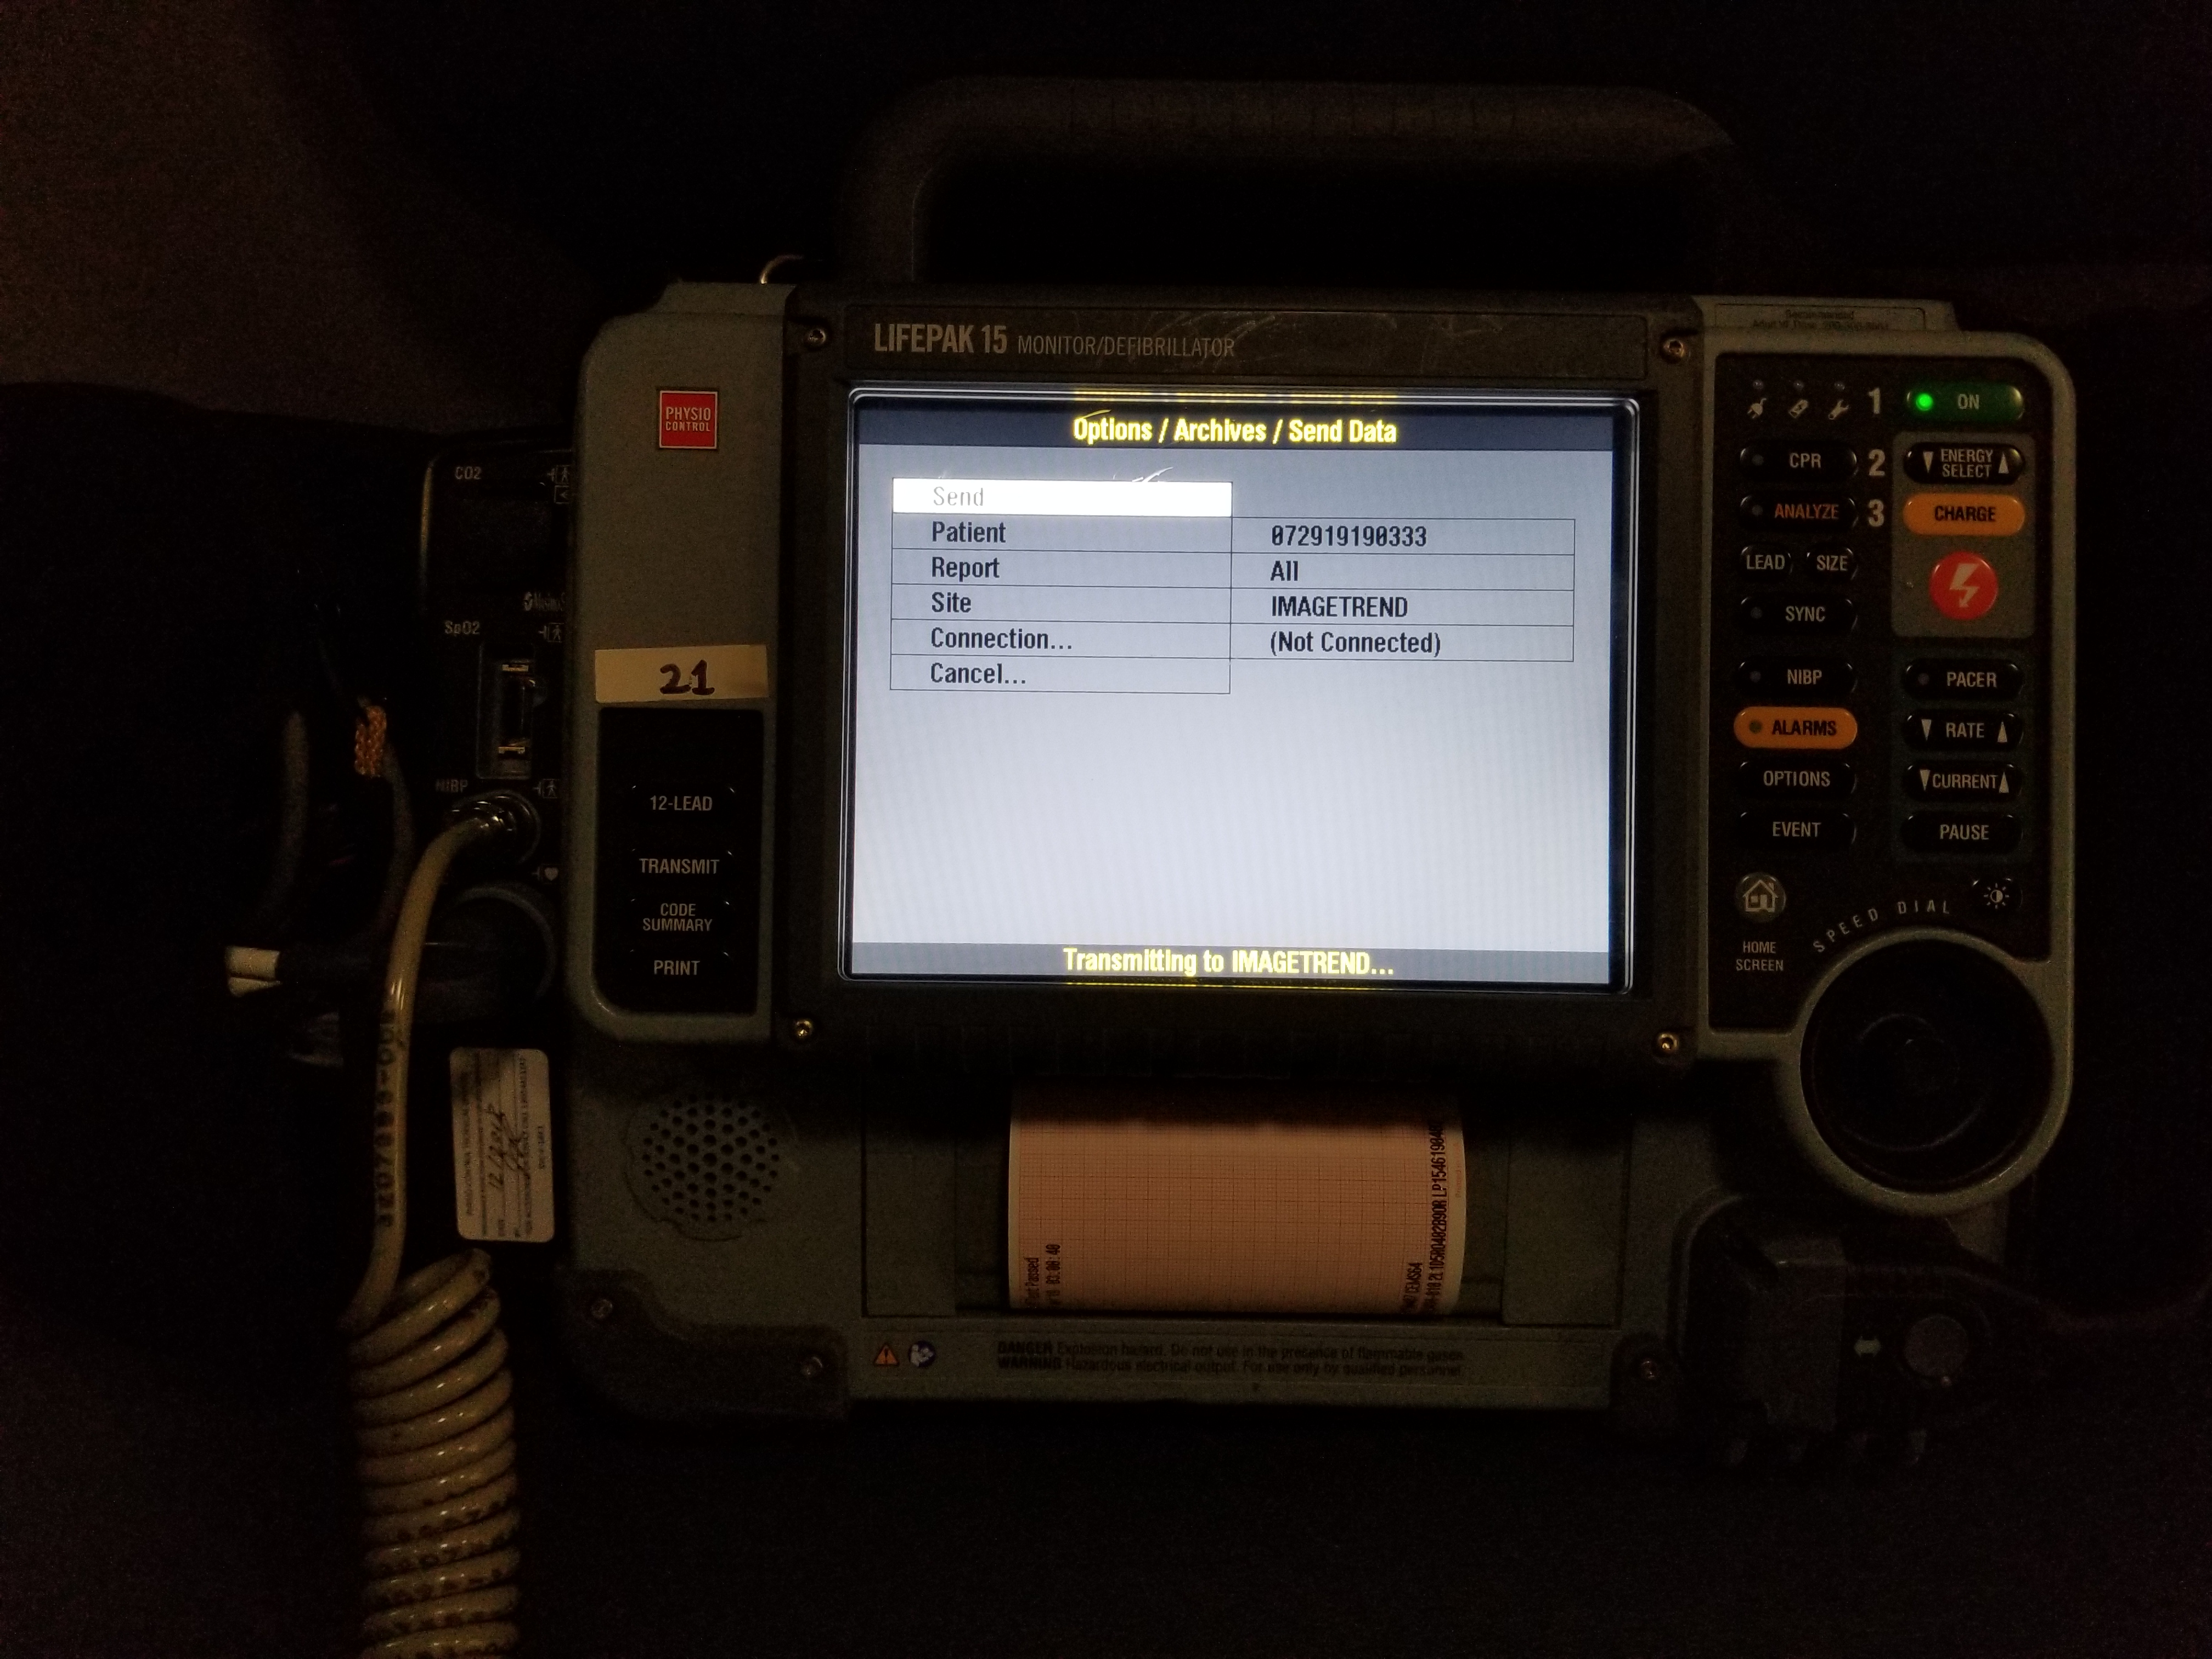
3. Scroll down to Site and select “ImageTrend” as your site.

4. Scroll back up and click Send. The cardiac monitor will then try to access the truck’s internet and transmit directly to ImageTrend. You will receive a message when this is completed successfully. On longer transports this can take several minutes to upload.
To download the data you have transmitted into Elite follow these steps:
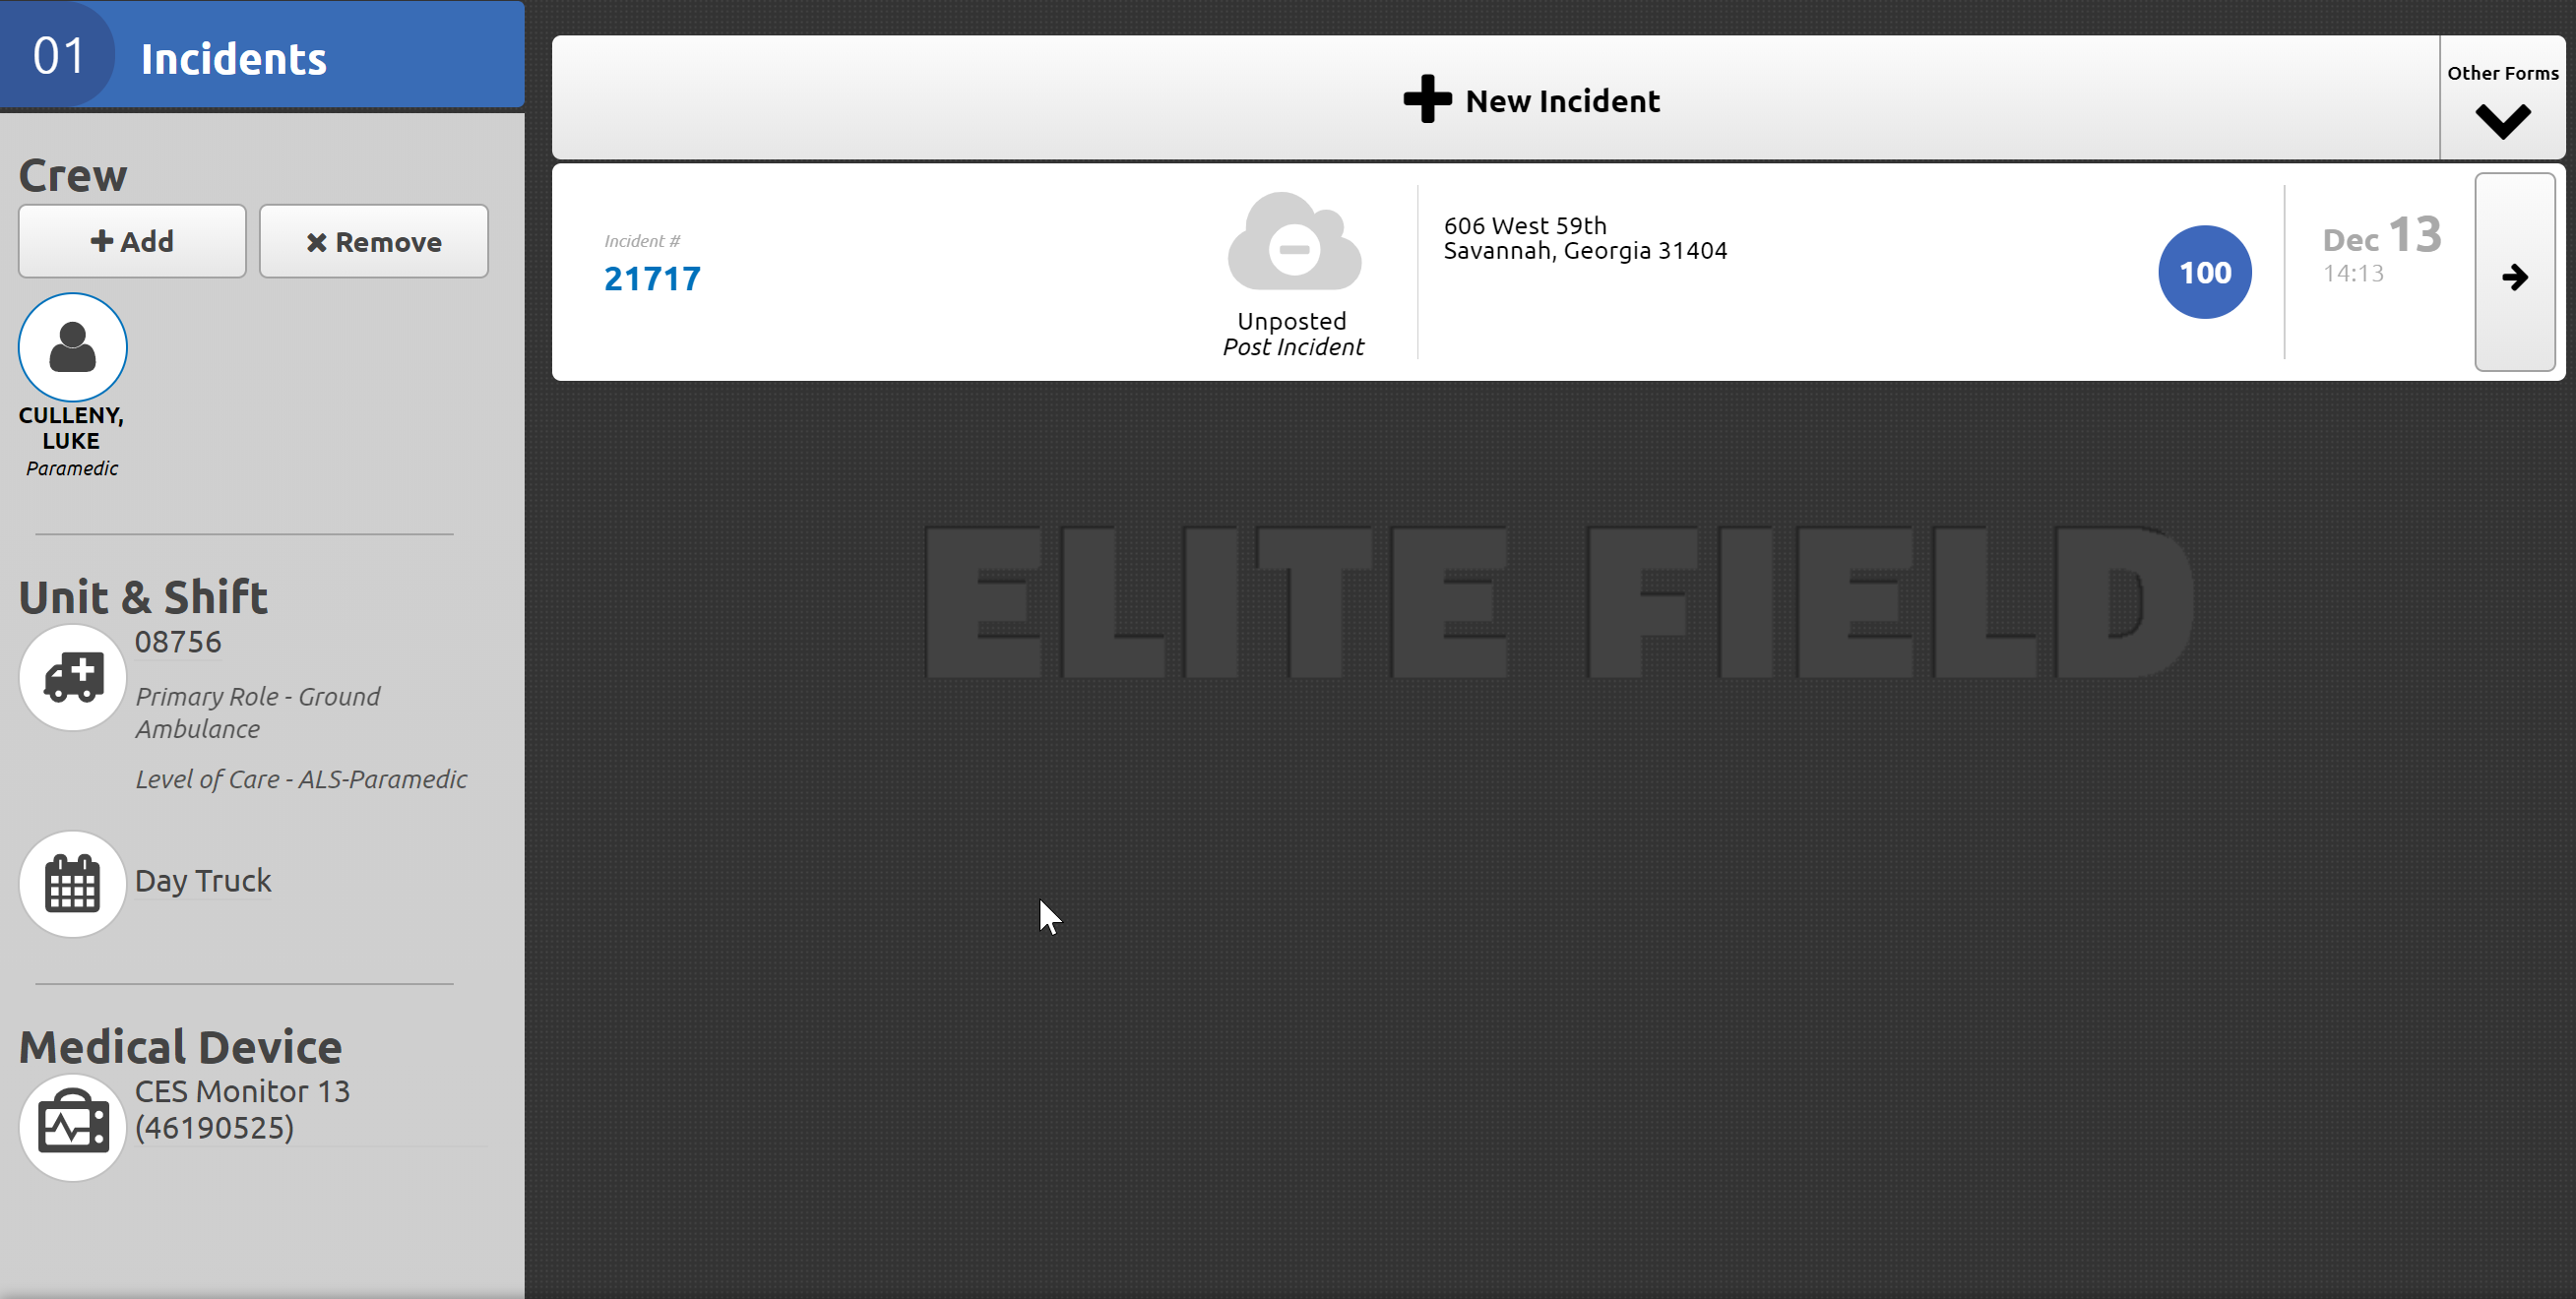
1. On the home screen be sure to select your Cardiac Monitor number under the “Medical Devices” section in the bottom left.
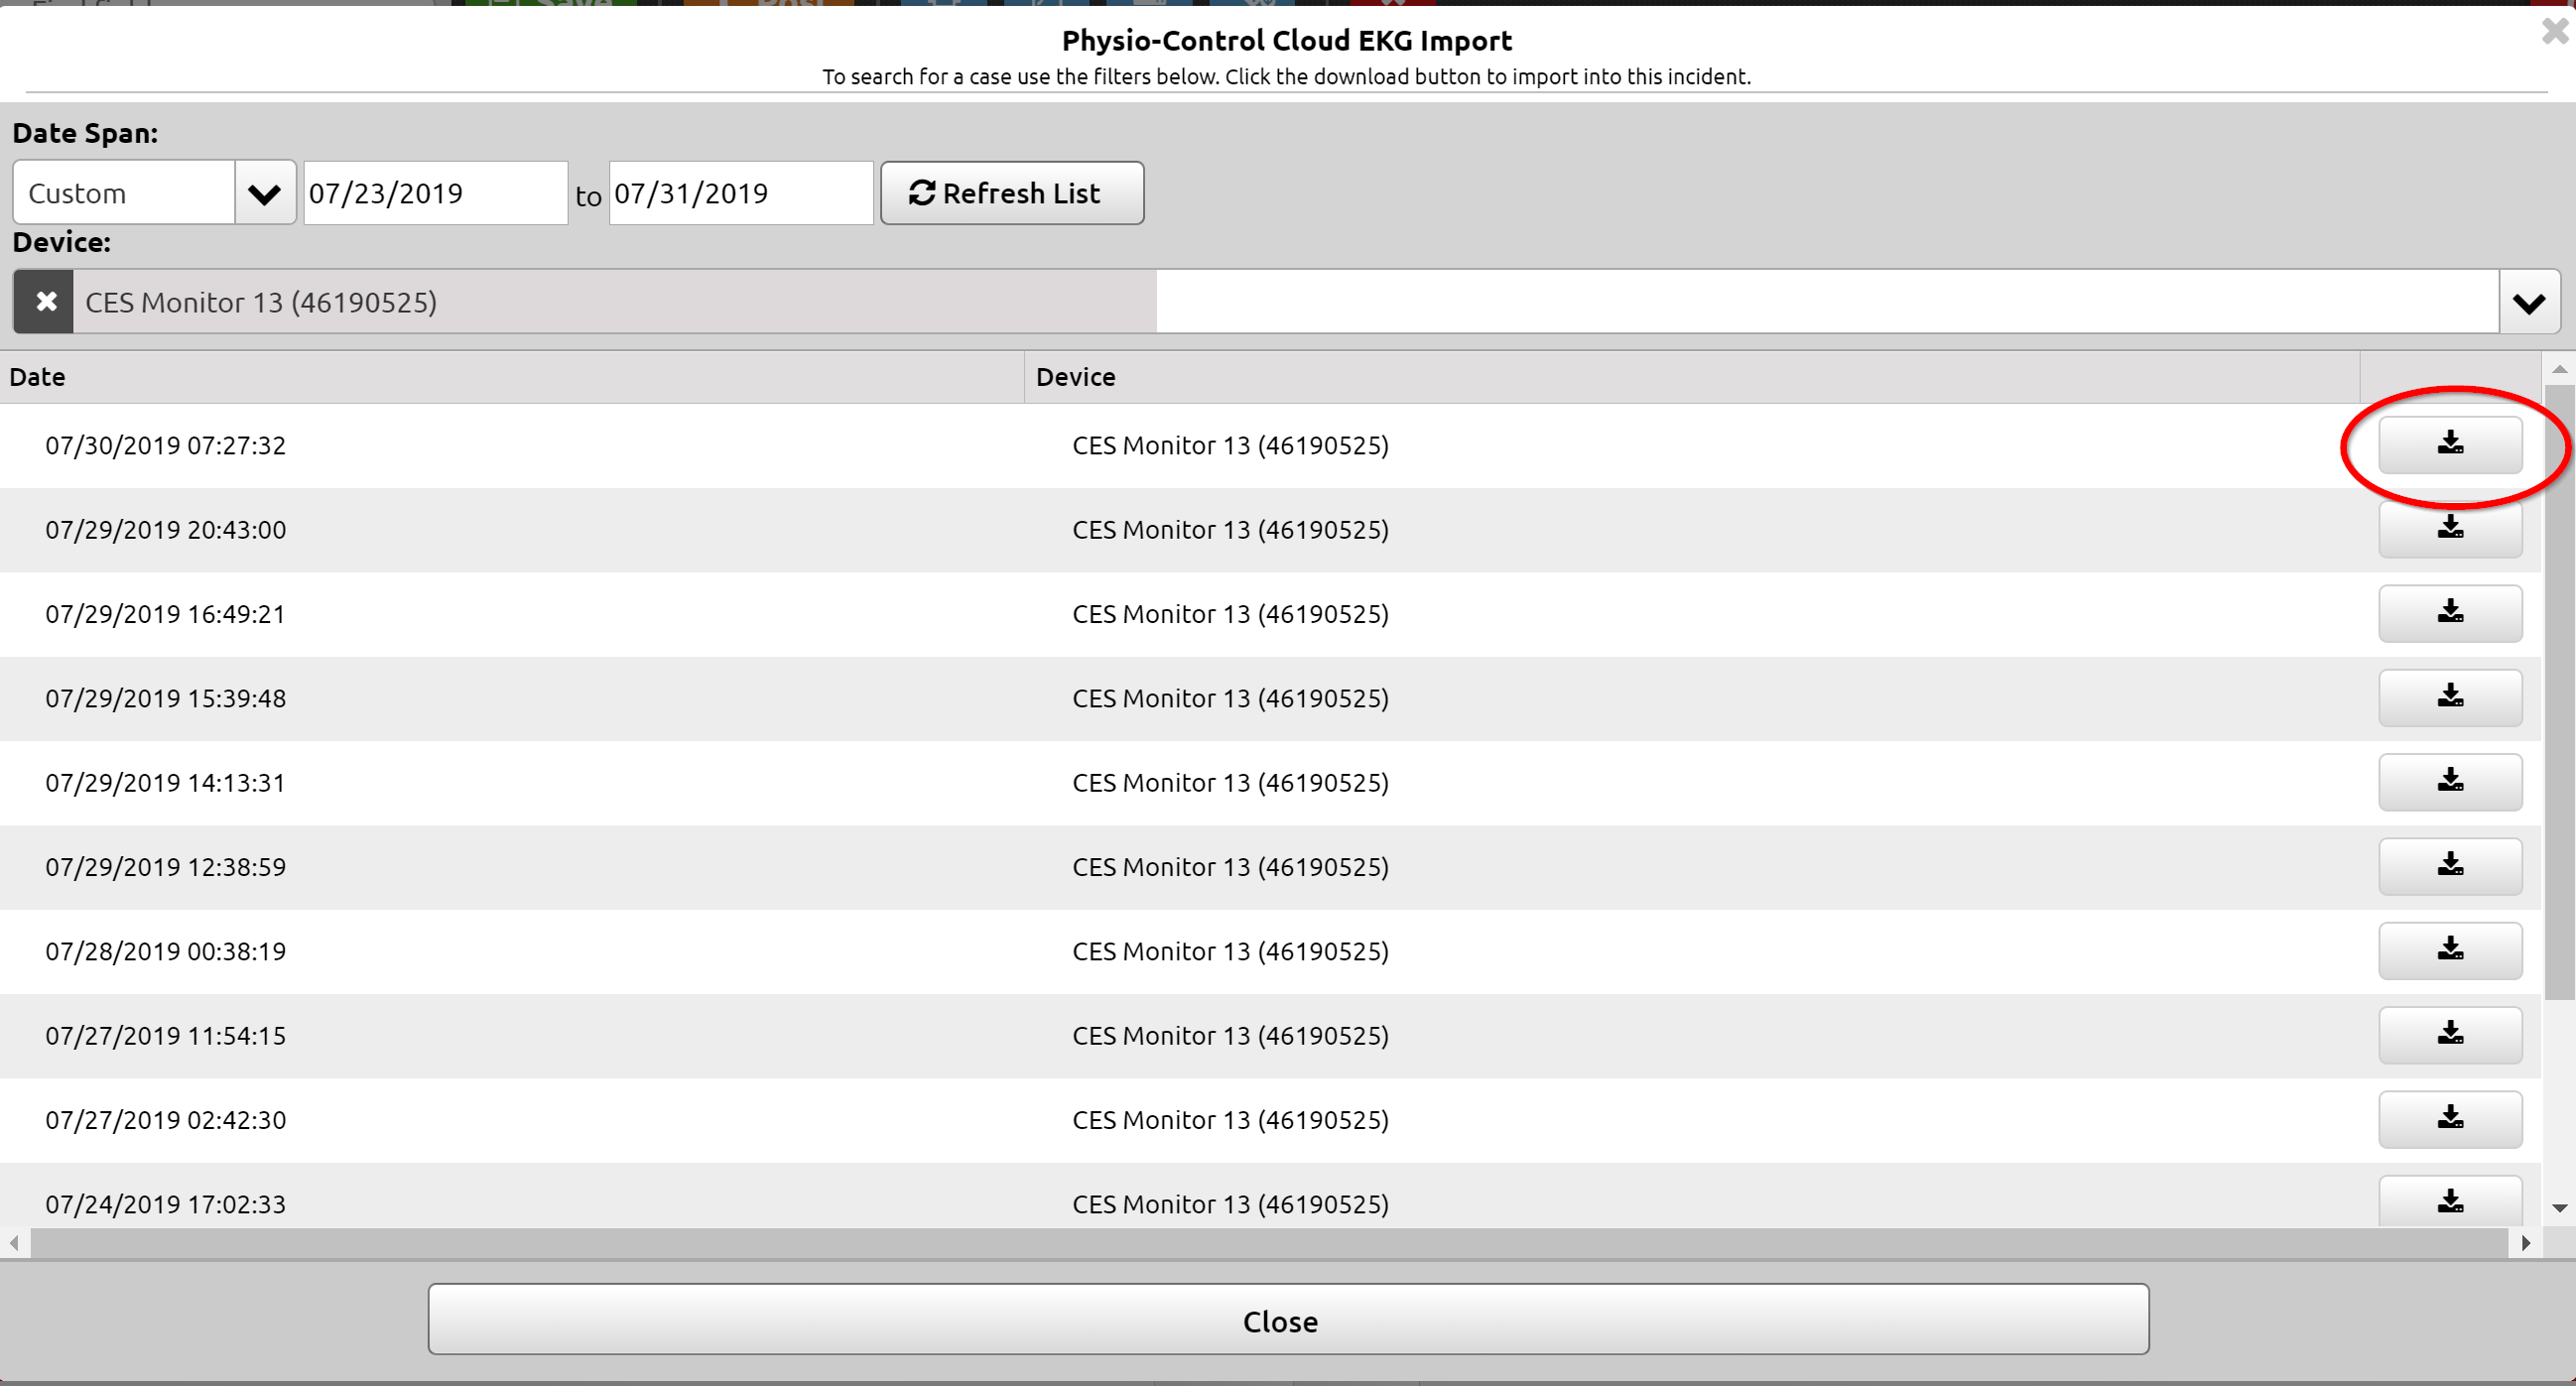
2. Once inside your report you will see an EKG button at the top, you will click this button and then select “Physio Control Cloud.” This will display a list of all available Physio Data for that cardiac monitor. Find your correct patient data and press the download button on the far right.

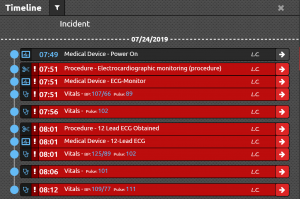
3. This will import and create Procedures, Vitals, Medical Devices, and Medications where marked within the report. You will see the Timeline on the far right once the import is complete. You can close the timeline and continue to “Provider Actions” section to complete the entry of all Procedures, Vitals, Medications, and Medical Devices. Un-needed sets of vitals can be deleted.

CES Phone Extension List
Intended for use by Employees please view the official CES Phone extension list by following the link. Note that all extensions can be dialed from any phone by calling 912-354-1011 and dialing the extension at the menu.
Need Immediate Help?
The IT Department is available to be reached via phone Monday-Friday 9am – 5pm. Please remember that the preferred method for support is an ePro Support Ticket. Afterhours support is also available for critical system failures, we can be reached at (912) 544-2300.